
When it came to the first floor bathroom, I knew I wanted to continue the flow of a light and breezy beach house. I knew I wanted white trim and touches of the sea.
When I went looking, I came across some wonderful inspiration!
I knew I wanted to bead board the ceiling after seeing what Shelley on House of Smith did to her little girls bathroom ceiling below.

For an AMAZING step by step process, you can check out Shelley's tutorial here.
I also knew I wanted to go with board and batten walls.
So I searched around on Pinterest and found this room. It spoke to me! Build me Helen, it said!

Source: One Nutty Girl via Pinterest
Check out One Nutty Girl for the step by step of how she put together her wonderful board and batten wall. It's awesome!
For my board and batten design, I can't get away from wanting thick boards. So, I knew for my design I wanted to have really thick top and bottom boards and wide wall boards.
I searched high and low for a color that said beach, and of course I found one in the turquoise family. I know, go figure, I always go back to turquoise. There were a few colors that I really liked, but inevitably, I chose Tidewater by Sherwin Williams.
So this is what we started with...


First we painted the walls. We didn't stop halfway down since I didn't know when we would be putting up the board and batten ;-)


The next step was to rip out the base boards.

Here is a shot of the ceiling before we put the trim and bead board up.

And here is a shot of the ceiling nearly completed with the trim and bead board nailed up! Any takers to spackle and sand?? Hello, are you still here? Well, it is definitely not my fav. part, but well worth it in the long run.


Here is the 7 in. Base board. I went with a 7 in. base board because eventually I want to put hardwood floors down which will bring up the base to about 6 in. I think it is key to make sure that the whole vision of a room is factored in all steps of a project, so that in the end, you don't have to back track or redo parts of a project. Definitely a money/time saver in the long run!

After the base board went in, the top board and ledge were next.

Finally the bathroom window framing was completed and wall boards went in!
Again, here is what the bathroom looked like at first...
And here it is Now...

I love "me" some trim work!!!

Here is the finished ceiling after a loooot of spackle and sanding!
Sorry for the glow in this picture, my bathroom is just so much happier now, it SHINES, ;-)

A little closer shot of the window. I think the window frame out is my favorite part of the bathroom renovation so far! A cute petite window!


This pic is most true to the color you see in person.

Now I need to find some inspirational pieces to finish things off!
High on the list is new lighting, a mirror, and a new vintage vanity. ??? New Vintage Vanity (that might be a little contradictory) ;-)

I really like this mirror from Lowe's.


Here are a few of the lights I am considering. If I go with the first light, I would put it directly over the mirror, like the picture below. If I went with something like the second light, I think I would purchase two.
I think they would be nice, sorta elevated on either side of the mirror.

Here are some more inspirational pictures I have collected over time. I am sure that most of them are from Pinterest, but I just saved them into a folder on my computer, since I hadn't planned on starting a blog until recently :-)

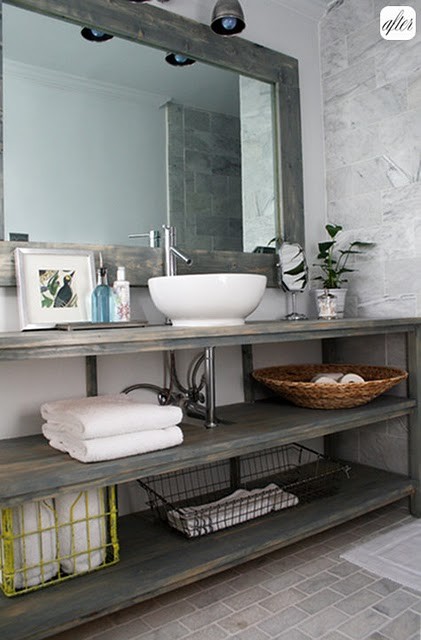
I really want an open concept bathroom vanity. Maybe something with a barn wood or driftwood style base like this one above or below! Barn Light Electric is a great site to find lighting like the one above!

This bathroom is flawless! Yes Please!

Hopefully you are inspired by some of these beautiful bathrooms like I have been and if you happen to know any of these picture sources, please send me a message, so I can give them credit!

Georgous rooms, love your inspiration pics to! Visiting from Remodelaholic & just wanted to let you know I love your style!
ReplyDeleteAww thanks Mimi for the compliments and stopping by to check out the blog ;-)
ReplyDeleteThis looks great! I'd love to do something like this in my bathroom, but I'm always wondering what you do about sink, toilet, and other obstructions. Did you remove them or work around them? Thanks!
ReplyDeleteHey Jessica, for this project, we just worked around the existing toilet and sink; wasn't too hard. The only thing is I wish we would have pulled the sink out a bit and then ran a board right behind it, instead of on to the sink, but we will be pulling out that sink and installing a new one, so we will just replace that one board. Thanks for taking the time to comment :)
DeleteI love it! I was going back and forth in my mind; board & batten vs. beadboard. Its' pretty neat to see exactly what it would look like with board & batten. You did a great job.
ReplyDeleteThanks Tammi I appreciate it. Yeah I think both styles look nice. To switch it up I did the ceiling in the bead board and the walls in board and batten. I think they go well together.
DeleteI love your style! I had one question about the sizes of the mdf boards and how far apart you put them on the wall to make the board & batten? Thank you!
ReplyDelete