
This weekend we began the first little bit of our spring projects. We are very excited to be able to take our diy projects outdoors. Spring is my most favorite season of all! How many of you are with me on this? I just feel like it is a fresh start to the year (Even though the year started in January). New plants, new outdoor projects, and all sorts of fun spring cleaning jobs inside too!
The only not so great part of the weekend was fighting the rain to get some of the smaller outdoor projects taken care of. I told the hubs, "It is like an all day shower with your clothes on." What's not to enjoy :)
Well, let me fill you in on a few of the projects we are hoping to accomplish outside:
Tree Planted in the Front Yard
Hanging baskets
New Mulch in the front beds
Large Projects To Do
A new white picket fence
Build a shed for all of the gardening equipment
This weekend was the perfect time to get the smaller things out of the way.
I knew I wanted 2 hanging baskets for outside the front door area and a few small strawberry plants to add to my big pot.
On Saturday morning, my husband went and picked up the tree for the front yard. A Yoshino Cherry is what we planted in the front yard of our first home and we loved it, so we wanted to continue the tradition.
The tree in our first home looked like this...

This is what it looked like after 3 years.
Not this...

But once the string was cut, the Dr. Suess tree turned into this...

Once we figured out that we wanted to plant it in the middle of the yard , we measured the distance from the tree to the house, from the tree to the neighbors yard, and from the tree to the street. Measure, measure, measure! The Yochino Cherry grows 20 feet out from the trunk, so full grown it will be a big guy!
Next on our Saturday morning list was a trip to Lowes. We needed top soil to plant the tree, Lime for the grass, 2 hanging flower baskets, 3 small strawberry plants, and the concrete supports to prepare the base for the shed.
Don't you love how you have a list and then you see some must haves. We saw a 2 axeled wheel barrow, and since we don't have a wheel barrow, the list went out the window.
It really went out the window when I was standing looking longingly at my beautiful petunia baskets, and a lady working at Lowes, who must have wanted to break up my "blossoming" love affair ;-) , introduced me to this...

She said that she was introduced to it 20 years ago, by a customer and she has never been the same since! She said to put it on all of my annuals every two weeks and they will grow to Pee Wee Hermon Vegetable Standards .
Well Maybe she didn't say the last part, but that is what I envisioned when I heard her describing how my flowers would be lush and cascading down the sides. For $8 buckeroos, I was sold. It doesn't take much for me to be sold, he he.

So, I followed the directions and we shall see how the plants and flowers do. I will do a before and after when they really start to grow.

We got home and unloaded the truck and got to work tillin' the gardens to get them ready for the mulch.

There he is, my wonderful wheel barrow with two front wheels. His main job is to stop me from taking a sideways plunge and losing whatever I have in my wheel barrow.
.

We have had this claw grabber thingy (technical term) since we got married. Which has been about fourteen. It has been a life saver in the garden and it's actually fun to use. Each year when we add new mulch, we just till what is left into the dirt since we buy the type of mulch that eventually breaks down. It seems to give our flower beds lots of nutrients for the plants to grow.
Then, last on our Saturday list was to get the tree planted and a patch of burnt grass, that we can only assume came from our lovely doggy, replanted.
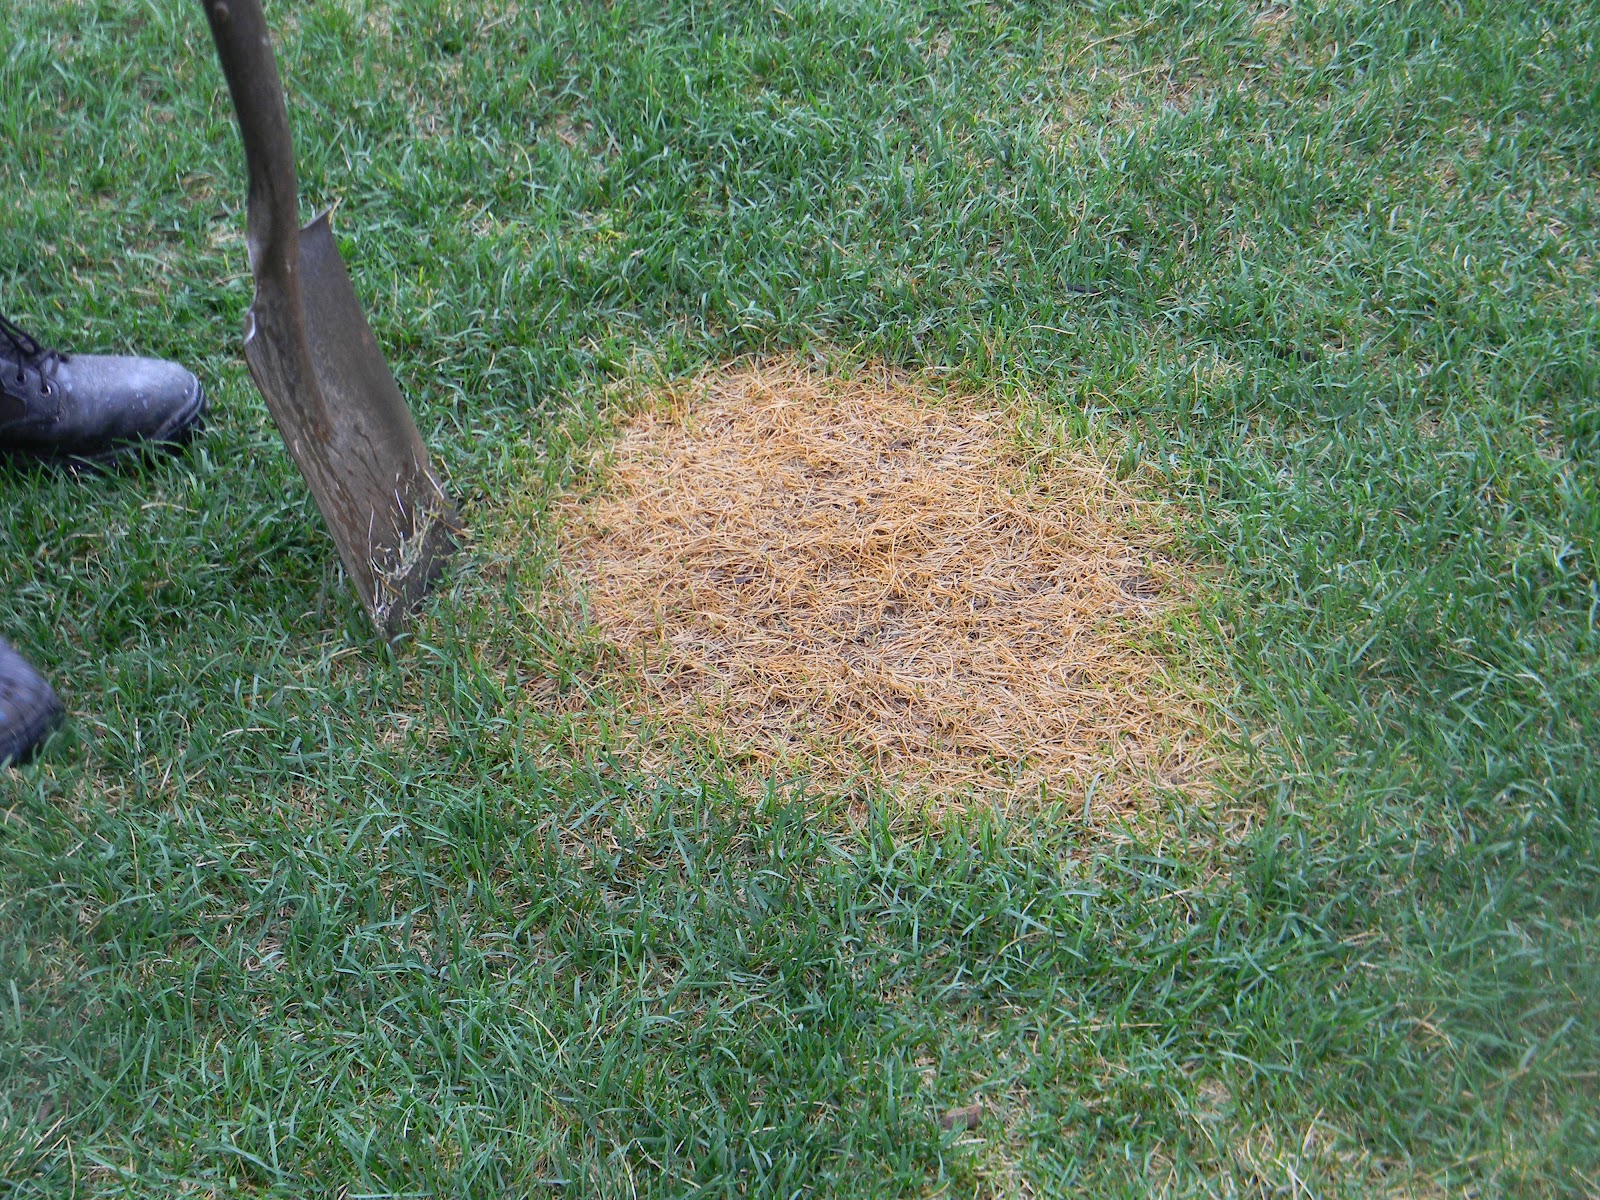
My husband is so smart. I would have cut the circle out and then tried to match up another cut out circle, but can you believe there is an easier way! What about a square! Genius I tell you, genius ;)

Yep, just cut a nice square around the burned spot.

Pull the square of dead grass up, use it as a template on the grass you are replacing it with, and viola!

The grass we replaced it with is from the spot where we we put the new tree. I don't know why, but when I saw what my husband was wearing and how he was standing in this picture, I started laughing!

To dig our hole for the plant, we sprayed a circle around the the plant, removed it from the spot and dug our hole. You are supposed to dig the hole three times bigger than the root base, so that is just what we did.
A few neighbors stopped by to watch the process, while a few of the manly neighbors were kind enough to jump in, literally :)

So after a "small" miscalculation of 20 bags of top soil ;-), and one more trip to Lowes, we had a beautiful tree planted. Yay!
For the last part of the weekend project, my hubs was back at work at the firestation, so I took the truck to our local mulch supplier and got two scoops of mulch! I looked like a woman deciding over which purse to buy. The man working there asked me, "do you want red mulch, brown mulch, dark brown mulch, or black mulch?" What to decide, what to decide! I even tried to take a pic when I was there and send it to Dustin. These are very critical decisions ;-)

There is nothing like a nice fresh pile of mulch and a garden that looks so much happier now...

This is our front entry with the hanging baskets up.

On the right side where you see the small sprouts of green are my mums coming back from last year. They are white in color.

These ones on this side are also white mums.

I have some small azalea bushes and the two large clumps of green sprouting up are my large purple mums that I planted last year. In front of the mums are some more small white mums. It is very plain looking right now, but this garden will have a lot more color once all of the flowers bloom. My plan hopefully this next year is to add a few more bushes and flowers to this garden to really fill it in!

A close up of Ms. Petunia.

Our happily planted tree. You can't really see the twine holding it together, but it is there.
So, here's to the start of our outdoor projects. Stay tuned for a picket fence, a shed, and hopefully some garden boxes for fruits and veggies!

0 comments:
Post a Comment