January 31, 2013

Sneak Peak into the Minecraft Party


I am just coming up for a quick breather while I am working on a Minecraft Party for my son.   Last night I made some Minecraft things on Photoshop to go with his party.  I will share a few quick and easy tutorials/how to's this week for what I have created so far.
This morning I baked the cake.  I baked up two 10 in. square cakes in order to create the Minecraft cake.  I will share a few of my decorating tips in an upcoming post!
I have been searchin' around online to find some Minecraft Ideas, and I found some awesome ones!  I created some candy bar sleeves and printed and attached Minecraft animals to each one: details to come.  I will share my sources in my next post when I do a little tutorial on the wrappers.  I am getting excited for this party to get here :)   The tnt is pop rocks.
Some water bottle wraps I created on Photoshop and Steve Goody Bags Using XL brown paper bags.
And finally,
Minecraft Coal
It started out so pretty and fluffy, and ended, well... not so pretty.  But that's the point of it and I'm hoping the kids will get a kick out of it. Recipe to come in the following post.
Now, back to the kitchen to finish off the truffles, bake the cookies, and possibly get the cake decorated tonight.  Oh, and you should see my house, it is SPOTLESS!  If you categorize spotless as having the sink filled with dishes, every counter filled with junk, and the laundry piled up, then yep, MY house is Spotless ;-) 
Take care for now!
If you enjoyed this post and don't want to miss out ;-) click up top there on the right and follow along!
For information on my on-line design services, please click here.
For on-site design services {Greater Hampton Roads and Richmond Virginia}, please email seasideinteriors01@gmail.com for pricing and availability.
Seaside Interiors


January 30, 2013

Redecorating and Painting my Mum's House!

Hey guys, I hope your week is going well,  I am just gearing up to do all of the baking and party stuff for my son's birthday party this weekend.  We are having 8 boys stay the night.  I know I give up!  He has made a lot of new friends at school this year and he really felt bad not inviting certain ones to his birthday party.  So, I had to put a stop at some point because, well... 8 boys for a Minecraft party is Coo Coo!
 
 
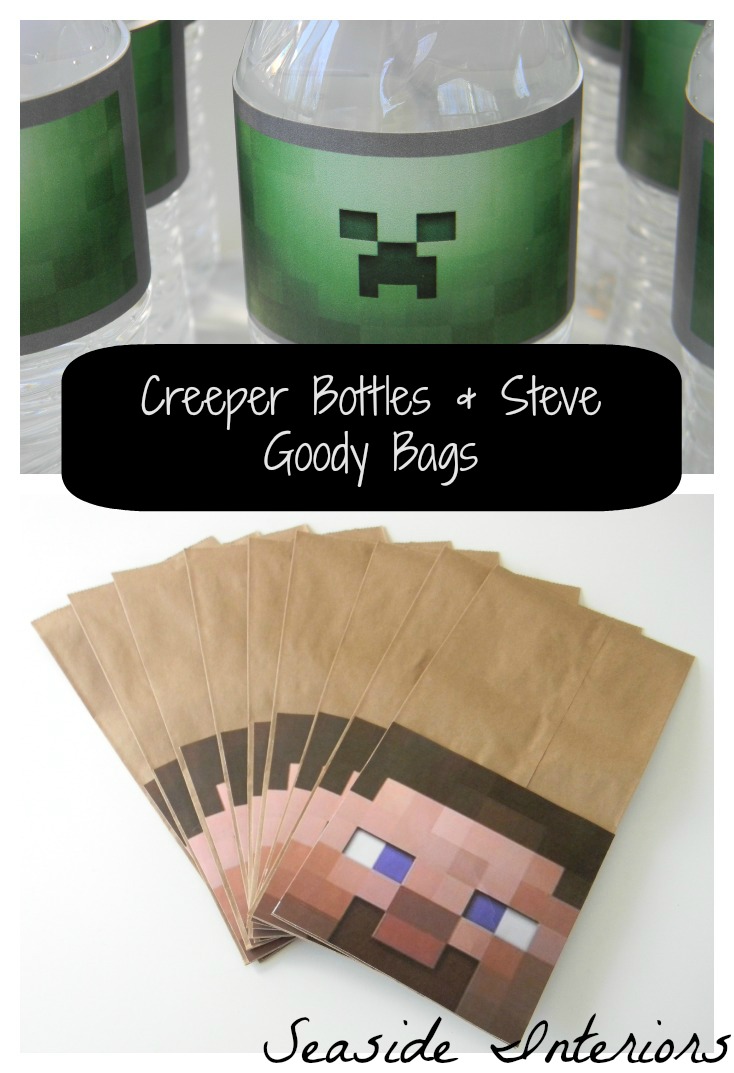
I will be posting some of the tutorials for the party coming up later on this week.  Everything from the cake, to the cookies, to the truffles, to the goody bags, decorations, and games.  I still have no clue as of yet as to what I am putting in the goody bags.  I know I am procrastinating, but we just got back from a trip and the laundry hasn't been done and the bags are still packed.  Does this happen to you guys or am I the only slob? 
 
 
Well, what I've been working on today might have something to do with why I am behind on unpacking things.


Since I opened my business in the summer of last year, I have had some amazing opportunities to work on different Room Installs and several Online Design Boards for clients.  Since this is my first year of business, I have taken every opportunity I could to create a memorable space for each person I have worked with. 
 
 
Most of the time when you go into a person's home, you are working to create the best room for their likes and personalities and that has been my goal each and every time.  Now, my newest clients goals and likes are pretty much the same as mine since she kinda gave birth to me and we kinda have the same taste in decorating.
 
 
Recently, my husband had decided to offer up his painting services to my mum and dad who are in desperate need of having their home updated.  My parents bought the house when I was 17 years old and still till this day, it has the same paint color that it did when they bought it.  In the midst of having Dustin paint the house, they were also hoping that I would be interested in helping them decorate.  Sort of a one room at a time thing. 
 
 
Their my mum and dad so of course I would be interested.  Also, my mum is slightly biased and likes pretty much everything I do.  As a kid  I would say, "look mum, I made a mud pie cake."  She would say, "that is the loveliest mud pie cake I've ever seen!"  Even now, if I cook her dinner, she will say something like "Oh wow, what did you put on this chicken, it is so tasty?"   Ummm, "Salt and Pepper mum."  So as you can see, she is very easy to please and definitely my kind of client ;-)
 
 
I went over to their house today and got started on some much needed wall fixin'.   MUCH NEEDED I say!   
 
 
This is how my mum has hung her artwork over the years.  You know, before those lovely 3M sticky tabs were invented.  I think my dad gave up on filling holes since my mum liked to change up her décor pretty regularly.  So she would just hang large enough pieces to cover the holes.  I have now convinced her to invest in a large quantity of the sticky wall hangers just in case she wants to move the artwork around.


 I worked for several hours today on pulling out nails, sanding the walls, and spackling the holes.  Since I like to keep things real, Yes these are my Paint pants and yes, I may or may not have sat on a toilet seat to paint my bathroom only to find out my husband had put the paint lid on the toilet seat. 
 
 
Sorry if I look like I had an accident, but I'm not giving these guys up.  They are comfortable!
 
 
So with all that said, I think this will be a great adventure with hopefully not too many hiccups along the way. 
 
 
The list of rooms and spaces include the kitchen, dining room, family room, living room, master bedroom, staircase, and stairway. 
First room on the list to get going on is the Dining Room.
 
 
You really only have these two main walls, 2 rounded posts off to the side on the right, and a central wall on the left of the photo.


There is one post to the right in this shot.


Here is the central wall to the left of the room.  So really an open concept dining room. 
 
 
Let's take a look at the to do list.
 
 
1. Finish spackling all of the holes in the walls.  Every dot, you see in the distance is a hole that needs fixing.  Then we are going to put this table and armoire set on Craigslist.  We are on a budget here people ;-)
 
2. Paint the walls a fun new color and Cheer LOUDLY since this beige color is the original color that is throughout the entire house.  It looks ok from a distance, but believe me, not so good up close.   My mum has already said that she will not be doing anything but sitting and watching as the first coat of paint goes on this wall.  She has plans, what can I say?
 
 
3.  Paint trim
 
 
4. Replace all light switches and plugs from cream to white.
 
 
5. Find new furniture for the space including a console table, unit, lamps, artwork, blinds, custom made drapery that my mum will be creating, a new table, chairs, and accessories. 
 
 
6. Cry in unison when the room is complete!
 
 
7. Start on the next room.
 
 
Most of the rooms just need a lot of TLC, but the kitchen, well, that needs a sledge hammer!  I'm not kidding, that place is SCARY!!!  So I will be trying my hand at not only decorating but designing my parents kitchen.  I will be doing it through Ikea's online kitchen design since we are squeaking by with a very small budget. 
 
 
Did I mention that my parents have never stepped foot in an Ikea?  I know sacrilege right?  So, Dustin and I are planning a trip to take my parents to Ikea in a few weeks.  Once I told my dad that they had good food for cheap, he was in. 
 
 
So, please stick around and catch our trips to some of my favorite stores and thrift shops and the transformation of each room as we give my parents a lovely redecorated and somewhat renovated home. 
 
 
This week I will be working on the Design Board for the Dining Room, so I hope to share some of the items we will be searching for or purchasing for the room.  Also, the great thing about working for family is that I can share where I purchase items from and how much things will cost us!  Yay! 
 
 
If you enjoyed this post and don't want to miss out ;-) click up top there on the right and follow along!
 
 
For information on my on-line design services, please click here.
 
 
For on-site design services {Greater Hampton Roads and Richmond Virginia}, please email seasideinteriors01@gmail.com for pricing and availability.
 
Seaside Interiors


January 27, 2013

Giving the Kids an Updated and Colorful Bathroom Makeover!

We decided to take a family vacation this weekend and we traveled to Snow Shoe West Va.  Where it was 2 degrees at times with a wind chill that put us in the negatives!  I pretty much ran back inside after two trips down the mountain. 
 
The kids on the other hand where so much braver than I was.  They had a blast learning how to ski and today the weather was great!  The sun came out, the temperatures rose up to the 40's, and I was able to stay out a little longer and ski.  So now as my family heads back out in the cold evening weather to get in their last ski session, I decided to put a little time into deciding some things for my upcoming project that I am really happy about...  THE KIDS BATHROOM! 
 
Here is a photo of the bathroom...
 
 Actually, right now we have a plain white plastic shower curtain hanging up since my husband thought this one was not "kid like" and he took it out.  So a blob of beige and white is what we are actually working with.  The floor is laminate, but I am hoping to do a gray slate tile floor.
 
 
VIA
 
We previously did this type of board and batten treatment in our First Floor Coastal Bathroom Renovation and still love how it looks!  I figured with some silver hooks and numbers, just like the amazing photo above, both of my kiddos and a guest could have their own towel hook.  The guest meaning my sister who likes to use the floor as her towel holder ;-)   
 
Here are my choices for wall colors:
 
Martha Stewart's Azurite by Home Depot


Repose Gray By Sherwin Williams
 
Paint Color SW 7015 Repose Gray from Sherwin-Williams  The colors of 100% of our walls in the new house.
 
I'm leaning towards the Repose Gray since I think it will give more of a contrast against the navy and white striped shower curtain.
 
 
What do you think of the look of two shower curtains instead of one?  It just turns your bathroom into a picture window basically and I kinda dig it!  Plus as a bonus, my kids would like it, since they are sorta scared of closed shower curtains, lol.  They always push open the curtain and I always close it so I can see the pattern, so now we could all be happy.
 
 
I wanted the West Elm Navy and White shower curtain, but realized if I was going to do two curtains, I would need to go with a more budget friendly option, so I chose Target's striped Navy and White Shower Curtain for $14.99 each.
 
 
Sorry the photo is blurry, but it was taken with my phone that apparently had a lovely smudge across the lens. 
 
Pinned Image
Here it is online, although I couldn't find it on Target's website, it is in stores.  It is a cotton blend material.
 
What I thought I would do to make it more of a custom made piece is add a solid piece of navy blue material to the bottom of each curtain so that the Navy blue piece will go up to the top of the bath tub and the striped material will go the rest of the way up.  It's the same affect that you give to windows to make them feel much larger than they really are.   To give you an example, here are the curtains that I had made for a client recently for her Living Room Makeover


The sandy beige color meets the steely blue tone right at the window sill where my navy material will meet the navy and white striped material at the top of the bathtub.  I think it will make everything look finished off.
 
I can't wait to get in there to start making some changes, freshen things up, and make it really nice for my kids!
 
I am going to put together the design board for it in an upcoming post and also give you all of the sources for the items and supplies that I purchase for the room.  Take care for now!
 
If you enjoyed this post and don't want to miss out ;-) click up top there on the right and follow along!

For information on my on-line design services, please click here.
 
For on-site design services {Greater Hampton Roads and Richmond Virginia}, please email seasideinteriors01@gmail.com for pricing and availability.

Seaside Interiors


January 26, 2013

The Completely Neat Organization of an Ikea Office

Now that we are starting our office makeover, we are going to be picking pieces that are not only functional but also budget friendly.  So who better to take a look at than Ikea? 
I am like a kid on Christmas morning just thinking about the trip there and the free yogurt that I will get when I arrive.  Mmmm!!! 
I just headed over to the website and started looking for organizational pieces and found that you can sign up for free to be part of the Ikea Family.  Am I the last to know of this?  Probably!  Needless to say, if you have not heard of it either, you can sign up for free HERE.
For signing up you get some cool freebies and discounts.  Like buy one yogurt and get one for free when you receive your card.  Ok Yes Please, but could there be anything more that you would want besides Yogurt?  If there is, these are some of their benefits:
1.  Monthly product discounts available only in stores
2. Additional discounts in their restaurant
3.  A chance to scan your card in store and possibly win  a free $100 Ikea gift card
4.  Free coffee or hot tea every time you visit Ikea
5. 90 Day Price Protection
I can't wait to share with you the items that I will be purchasing for the room, the trip to Ikea, cause ya know I'm gonna find some good stuff to take pictures of, and the actual room makeover start to finish! 
Here are a few more office pics to get you excited, since they did for me...
Pinned Image
I LOVE the white palette boards across the wall.  I would like to incorporate them into my office and  up top to your right is more amazing storage that I'm sure I could find at Ikea.
I think also a trip to the Container Store is a must while I am visiting Ikea to pick up magazine holders and various other boxes and such to store my office supplies and other items.
     We have a nook area just like that and I was originally thinking to put a wood and metal unit in that area, but now...  Maybe this would be a more budget friendly option. 
    Have a great weekend.  Take care for now!
If you enjoyed this post and don't want to miss out ;-) click up top there on the right and follow along!
For information on my on-line design services, please click here.
For on-site design services {Greater Hampton Roads and Richmond Virginia}, please email seasideinteriors01@gmail.com for pricing and availability.

Seaside Interiors

January 24, 2013

Feature Friday: An Unbelievable Navy Blue & Coral Office Transformation

I have been plotting and scheming to come up with a great design for my office.  There are so many ideas rattling around in my head.  I shared my original office design board a while back that had some really nice turquoise tones, but I have been heading in to deeper tones lately and I am all about the Navy blue and white color combo with a punch of color added in.  As of right now it is still up in the air, so I went looking to see what else would spark my imagination.
 
I searched around online and found some really nice offices, but none that caught my eye as much as this one...
 
 
Today I am featuring Jessica's office makeover at Home With Baxter.     I love the look of the navy blue, white, and coral color scheme and how Jessica brought it in so tastefully throughout the areas in her office.  All of the colors are very balanced and not overwhelming at all.  I love how crisp and clean the baskets and magazine holders look on her Ikea Expedit shelves. I like how she filled up the wall with two of the shelving units and her desk in the center.  It gives it a sort of built in feel.
 
 
Let's take a look at some more of this fabulous makeover shall we? 
 
Right, she can do no wrong with this!  Texture brought in with the baskets and layers brought in with fabric, color, and the shiny bits like the lamp and the shell. With such a crisp clean design, I think any designer would love to work and create in this space. 
 
Speaking of creating,  Jessica is a girl after my own heart, because she creates Online Design Boards like I do.  Jessica took it to a whole different level and turned her design boards into works of art. 
 
I know, I am dying over these.  I was just going to hang some of mine in frames on the wall, but after seeing this, I'm thinking how boring mine would have looked in comparison.  Another great thing about Jessica is that she doesn't mind me thieving this idea.  So, I'm just gonna tell you I may just copy it.  Don't you think everyone should display their work this way.  I have a feeling every time I look up at my Design Boards all sitting on a shelf like that I will get all giddy!  Don't even get me started on this navy blue unit turned work station.  Unbelievable!
 
Now, I don't like to copycat most things and especially not design, but hey, I'm just saying if you see various similarities between my office and Jessica's, it was a total coincidence ;-)  Thanks Jessica for getting me all sorts of excited to complete my office project.
 
For the complete reveal, head over HERE, where Jessica not only shares more fabulous photos of the room, but also her sources for where she got everything and even great tutorials on how she completed the cork board project and finished the cabinet in a gorgeous navy blue!
 
 
I hope you enjoyed the office feature.  Take care for now!

 
If you enjoyed this post and don't want to miss out  ;-) click up top there on the right and follow along!


For information on my on-line design services, please click here.


For on-site design services {Greater Hampton Roads and Richmond Virginia}, please email seasideinteriors01@gmail.com for pricing and availability.


Seaside Interiors


Minecraft Party Design Board!


A few weeks ago we did a Lego Friends birthday party for my daughter and now we are back at it again.  This time for my son's birthday. 

Ethan loves his Minecraft.  No, sorry, he LOVES!!!! his Minecraft.     Minecraft is a computer building game where you build all sorts of structures and you have to watch out for the Creepers (Mean men with bad mustaches).  My son would say it is so much more than that!  Whatever it is, the creators of it where really smart because the only music I hear coming from the computer is beautiful  piano music.  So it makes me think he's absorbing classical music, when in actuality, he's really blowing up blocks and takin out bad guys.  Smart I tell you, very smart!

 Yesterday I posted about his Minecraft Invitations that I made for his party.


After I finished those, I decided to put together a fun Party Design Board to help narrow everything down and give me a visual of what is needed to be done.  When I have a list in hand or in this case a picture, I am way less stressed to complete a project. 

Here is the Design Board I created for Ethan's party...

Sources


  In the game, they use the black coal to make things with, so why not eat it in rice krispy form? 


This might just be the easiest cake I have ever made.  A block with a piece of white fondant on top and some red squares.  Thank you Minecraft ;-)   I am not going to be able to use the edible images for the cookies since, as usual, I am on a strict budget.  Aren't we all?  Just say yes, even if you're not.  It will make me feel good, lol. 


 Instead of an edible image, I am just going to freehand some of the designs.

 Wish me luck and let's hope it doesn't turn out like this...


For the glass windows on Minecraft, they all have the white pattern you see on the Design Board, so hello roll of white tape.  Why I am most excited about taping this pattern to my sliding glass door I will never know.  I can tell you I won't be when it comes time to take it all off and clean the door, but I don't think about that stuff when I come up with my schemes ;-)


All though the Goody Bags from Etsy are adorable, again with the Budget, I will be making them.  Some cheap green paper bags and some black insulation tape should give me a similar look. 

I hope you enjoyed my little board for the Party, take care for now!

If you enjoyed this post and don't want to miss any of these amazing posts ;-)  click up top there on the right and follow along!
For information on my on-line design services, please click here.
For on-site design services {Greater Hampton Roads and Richmond Virginia}, please email seasideinteriors01@gmail.com for pricing and availability.
Seaside Interiors


January 23, 2013

Cupcakes and Minecraft Invites!

UPDATE:  Minecraft Party Printables are now available through Paypal on the right hand column of the blog! 

Today the only decorating I'm doing consists of cakes and party invitations.  Since today is my son's 11th birthday.


It seems to be getting harder and harder for me every year on their birthdays.  And next year he heads off to middle school.  I don't know what I'm gonna do when they turn 16 or graduate and leave home.  Well, he and my daughter confessed that they will be staying with us forever.  Ummmm....  I said it is getting harder and harder to let go, I didn't say impossible ;-)   We will need a little break away at some point, lol.
But none the less, he keeps getting older and I keep getting younger.  I know, it's so weird how that works.  I just go with it.
He will be having a birthday party sleep over in a couple weeks that I am starting to prepare for, but today, I just wanted to do something a little low key.  When I asked him what he wanted for dinner tonight, he replied "a full rack of ribs and creamed corn."  LOL.  He's quirky like that.
Last night while we were heading to the store, he said, "make sure you get everything to make my cupcakes for my class tomorrow and make them the best flavored ones you ever have.  So that when my friends in class eat them, they will love them and want to come to my party." 
Really, it is like he's running for office or something!
So I threw together some vanilla and chocolate cupcakes (box mix, SHHH!) with some chocolate chip butter cream and ran them over to school this morning.
 I put the butter cream together using the wilton recipe and just added in the chocolate chips.  I 6 x'd the batch so the measurements were:
Wilton Buttercream Large Batch
3 (2 Ib.) bags of powdered sugar
2 tbsp. vanilla extract
1/4 - 1/2 C. Milk (Less for stiffer icing; more if you want a soft batch)
6 C. Crisco or (3 C. Crisco and 3 C. Butter)
1 Large Bag of chocolate chips  (Chop them up and throw them in to the butter cream when it is mixed, but save some to add to the top when you are all done.
* Note:  I always cover my mixer when making this with a wet kitchen towel to help with the mess. 
I put them in my handy dandy cupcake carrier and took them over to the class. 
The other thing I had to do today was make my son's invites and send them out for his party.  He is having a Minecraft themed party.  He is Minecraft crazy!  For those of you who don't have a son, Minecraft is a computer game where you build and create worlds and have these weird faced bad guys called Creepers attack you.  Well, at least that's how I see it.
So I tried my hand at making the invites after I saw one that I really liked on Etsy.  I went into Photoshop Elements to create it.  I pulled pictures from Google and layered them on top of each other to create an almost identical one to the inspirational picture I found. 
 I printed them out as a set of three per sheet and cut them out individually.
I love that they are like concert tickets!
I actually found the Minecraft font online too and embedded it into my Photoshop fonts.  Oh how I love fonts :-)
Even though I printed them out on card stock, I wanted a really heavy duty weight to them, so I put some glue on the back of the invite and adhered it to a second piece of card stock.  Then I cut them out one more time.
See it is a really thick invitation now and looks more professionally printed.
All finished and ready to send.  
 As you may be able to tell by all the arrows and words on my photos, I have been playing around on www.picmonkey.com.  It's a free website that allows you to "pretty up"  your pictures.  You can also upgrade for around $33 for the year, which is what I did, so that you can put all sorts of titles and arrows and whatever else you would like to on your photos to finish them off. 
If you enjoyed this post then click up top there on the right and follow along :)
For information on my on-line design services, please click here.
For on-site design services {Greater Hampton Roads and Richmond Virginia}, please email seasideinteriors01@gmail.com for pricing and availability.
Seaside Interiors


January 22, 2013

Contemporary Living Room Reveal Start to Finish!!

Today I want to share with you my second install of the week. I think my favorite type of install is the ones in which I go in and complete an entire room start to finish in one go.  There is something about that type of process that I seem to work really well in. 

Fortunately, I was able to do the complete the transformation of this room in one day with the help of my husband.  Dustin has his own paint business that he started this year.  Fortunately for us, it has really taken off.  Between painting for his jobs and being the painter on most of my jobs, well we are keepin him busy!

My clients wanted a slightly formal living room with a contemporary vibe.  Something that was soothing yet lively.  The colors we were going with needed to give the couple a feeling of relaxation with some playful colors.  Which pretty much describes this family.

We will start backwards and work our way to the beginning, which pretty much describes me!

Here is what I  call a formal/contemporary/casual living room...


I brought the room together using this design board that I created for the clients...

These are the design boards that I create for my online and local clients as the starting point for what direction we choose to go in.

WANNA SEE MORE?  Oh K!!!
 
Yummy gorgeous curtains!!  A really pretty steal blue with a caramel colored bottom.  I made sure to measure exactly from floor to sill for where I wanted the caramel color to reach.  Notice how the rod extends further past the window so the curtains don't cover the window and it actually makes it feel much larger.


 A perfect spot to just curl up on the couch.  

Working with the client's budget, I knew we would be able to splurge on a few key pieces and then have to find deals on the rest.  I say splurge where it counts.  Accent pieces are easy to pick up here and there for a bargain.   Put the bulk of your money on bigger items such as furniture.  Since the clients already had the brown couch, I was able to spend a bit more on other items such as the creamy linen club chairs and the fabric. 
 
Even though the coffee table and side table are different, they still have enough of the same elements to bring them together without having them match exactly.  Both are two toned and both are metal and wood.


One of the two linen club chairs I brought into the room.  More seating for having family and friends over for a visit.

 
I really like how the touches of white in the room balances out the deeper shades of brown.


Bringing in the shiny based lamps adds another layer to the room.  Without them, the room would feel very flat.  Don't forget to add in at least one other shiny element so that the lamps don't stand on their own.  They need a little company.  I added the shimmery mirror above the unit to connect both pieces.


The glass bowl I found to go on the coffee table.  This is my artsy fartsy way of taking a picture.  I figured all of the amazing photographers take cool close ups, so I better take one too.  One day I will hire a professional photographer to come in and take some real artsy fartsy shots.  For now, I will keep dreamin.


Here is the cabinet that I chose to go under the mirror.  It fits the space really well by filling up this smaller angled wall.


And here are just a few goodies to go in the cabinet to bring more texture to the room.


Now you know what the end result looks like, let's take a look at how we got started yesterday.

When we arrived, all we had to do was remove the existing brown couch while we painted.  So we where left with a complete blank slate.


Once the couch was out of the room, we got to work on painting.  While we were painting I was able to video tape a lot of great techniques and tips that my husband was willing to share.  A sort of painting 101 that I will hopefully be sharing with you in some upcoming posts.

One of the first steps was to sand the walls down just to smooth your surface out before you begin painting.

While Dustin sanded, I got the frog tape and taped off all of the trim work.  We tend to work really well together on projects so I love having him around. 


 After he was done sanding, he got the paint ready.  The color I chose for the walls is Requisite Gray by Sherwin Williams.


 Here is a closer shot of Requisite Gray, which doesn't really look like that once it is dry on the walls.  I'll show you shortly. 


While Dustin was painting the ceiling a flat white, I utilized the client's dining room to bring in all of my décor for the room.


Getting everything together in one room allows me to pick and choose how I want it to go into the room and if I need to add anything or take anything away.  I also do this same add and take away deal when I complete the room. 


Once all the accessories where gathered, I headed back in to assist with the first coat of the paint.
 
 
Dustin worked on the top while I took care of the bottom trim.


Extreme close up of Dustin's expert lines ;-)  That's why I stay to the bottom where the frog tape is!


 In comes the rolling of the first coat.
 
 
Once you are done with the first coat, let it dry for a bit.  Go grab some lunch and come back and then comes the fun part.  Do the SAME EXACT THING all over again.  Yay!


All done!  It really is a great gray color.  Or greige color!  A bit of beige, a bit of gray and voila.
 
 
Once the paint dries, then comes my favorite part, putting the room together...
 
Bring in the furniture.
 
 
 It is easiest to start on one side of the room and then work your way over to the other.  So, first the couch then the end tables.  Just so your not pushing past one item and banging it with another.  I love the detail work on the end tables!


Then bring in your lamps and anything else that will go in this area.  If you have artwork to put in over the couch, I would suggest putting your pillows in last. 
 
Next put up the curtains, and finish up with the last of the furniture.  Finally, bring in the accessories to finish everything off.
 
 Here is the end result one more time...
 
 
I love getting comments and any feedback, so if you get a chance, let me know what you think!  
 
If you enjoyed this post then click up top there on the right and follow along :)

For information on my on-line design services, like the design board above, please click here.

For on-site design services {Greater Hampton Roads and Richmond Virginia}, please email seasideinteriors01@gmail.com for pricing and availability.

Seaside Interiors
 
 Linking to: