July 31, 2012

Navy & Yellow Nautical Nursery Design Board

Since my kiddos are getting to be more grown up everyday, I am starting to miss their baby days.  Especially all things tiny!  Tiny shoes, tiny outfits, and tiny squeaky voices!  So I have to live vicariously through others these days.

I was recently contacted by an online client to put together a Nautical Nursery, so of course I jumped at the chance!  Jennifer and Michael wanted a relaxed ocean feel to their nursery.  After working with them on their budget, I came up with what I feel is a completely fun yet relaxed nautical nursery!


Source List

*Please click on the item of interest to be taken to the website of your choice.


For information on my affordable design service, please click here.


July 25, 2012

A SNEAKY Peak!

Remember this mood board I did for a client...


Well, the mood board has changed quite a bit and now looks more like this one...


So, what have I been doing?  You guessed it, I've been SHOPPING!!!

I think shopping for a room is so much fun! 

So far, I have purchased the new chairs, which should arrive any day.  I also purchased the wall mirror.  I can't wait for that thing to come in, it's gonna be sooo pretty in the room!  The coffee table has been ordered and I also went ahead and ordered the accent pillows.  All the other bits I purchased are from local stores...


Pretty Mr. Blue Jug.


I really like the silver mercury glass look lately.  I think this one will go really nicely in the room.  There were a few other shapes in the mercury glass that I found, so it may look even better in a grouping with two more in different shapes.


No room redo is complete without a twig ball!  Am I right or am I right ;-)


This guy might just be my favorite piece so far.  I LOVE the height of this side table.  I think it comes in at around 26 in.  Most of the side tables I found where so much shorter than this one and did not have as nice of an impact as this does. 


The rusty green brown look of the metal and the dark beaten table top is a good combination.


Sometimes for accessories, I pick up extras for the room and then return what doesn't feel right.  I don't know, I would rather have options on install day rather than having to say "Huh, you'll have to do."  So, you may see some items in my posts that don't make it into the final cut. 


I have an infatuation with all things artichoke.  Isn't that what you guessed I was going to say, he he!  I don't know what it is about artichokes, but I love em!!!   This candle isn't sticking around, just the color of the candle.  I need to pick up a larger diameter one.     . 

 
So cute! 


Bringing the metal feel from the side tables in to the room with a nice tray.


Some nice tin Citron colored, I know, I went there.  Citron right?   Ok, I should probably stick with  yellow-green colored boxes, to possibly go on the base of the console table.


And the start of some pillow matching.  I like the blue lumbar pillows to go with the white club chairs.  The patterned will come in with the pillows I ordered.  The light green pillows will be a back drop to these pillows that will accent the brown couch nicely...


Did I mention I liked silver mercury glass?  No, ok, well I do, lol!  The flat dented look of these are so cool! 


A shiny brown alligator tote.  Might  be used as a magazine holder.

I love sharing the whole process with you guys, from the inspiration board to the purchasing and finishing up with the reveal!  Thanks for stopping in and following along on the blog :-)


July 24, 2012

Editor's Choice Award

 I think one thing I really love about blogging is all the great people you meet both in person and through blog land.  So, I was really excited the other day to receive an email from Matt, the editor at Be @ Home.  Be @ Home is a blog on www.Become.com, a blogging network.  They cover all sorts of different topics from decor to home improvements.  He liked reading my decor and diy posts, so, he asked if he could send me the Editor's Choice Award.  Um Yes Please!!!  Thanks Matt and your team for liking my blog :)


July 20, 2012

Furniture Before and After's

I recently showed the completed master bedroom that I decorated, so today, I wanted to share some of the the amazing furniture transformations! 

To give you a little hint on the types of paints to use on furniture, I wanted to show you the stuff I purchased at Sherwin Williams.  It's not a plug, I just love this stuff.  For awhile, I have been looking for paint and different paint techniques that will make the furniture look like it has just been purchased that way at a store.  So, through a little bit of research, I came across this paint...


I got a gallon in the low sheen black to cover the tall boy, dresser, and chair.  I also picked up a quart of the white for the desk.


And the kind associate at Sherwin Williams shared this primer with me.  This is the primer you need if you are painting any type of furniture that you plan on putting things on top of.  That way your decor won't stick to the paint or pull the paint up.


Okeydoke, so now that we have the paint sorted, let's take a look at the finished products...

MR. TALL BOY DRESSER

BEFORE...


This piece had a nice honey finish, but this stain wouldn't work in the design, so it got sanded, wiped down, coated in primer, and finished with two coats of the black paint.


And here is the AFTER...


DESK AND CHAIR


The desk was a nice piece to begin with, so we did the same process as on the dresser, except we used the white paint to finish it off.  I didn't want everything in the room painted black.  I think the room would have had to much of a heavy feel. 


This guy had good bones.  That's all I can say about him.  He definitely needed a little love and attention.


OK, a lot of love and attention :)  Once, he was painted and I added new padding and material to the seat, we had ourselves a pretty little desk and chair. 


Here is the AFTER...


DRESSER

I think the most difficult piece to paint on the project might have just been this guy...


BEFORE...


This one was a great find and something I knew the client would love, but I also knew that she wanted to make sure her husband was part of this space, which meant this bad boy needed an update.


AFTER... 


I really love how you can't see brush strokes or roller marks in the finished product.  The paint sort of levels itself out, which is nice.


So last on the list for the furniture redos is the bench.  I purchased the bench itself and added padding, covered it with a nice designer material, and finished with some nail head trim.

BEFORE...


A plain bench.  I like the simpleness of it, but for the room I was working on, I wanted to add a little umph to this piece.


Here is the AFTER...


In my next few posts, I want to share with you a few DIY projects I did for the room like the revamped cork board,  the bench and chair redo's, and the headboard.  Have an awesome weekend!!!


Linking up to:


If you enjoyed this post then click up top there on the right and follow along :)

For information on my on-line design services, like the design board above, please click here.

For on-site design services {Greater Hampton Roads and Richmond Virginia}, please email seasideinteriors01@gmail.com for pricing and availability.

Seaside Interiors

July 18, 2012

Homerama: Part 2

I hope you liked the photos I posted in Homerama: Part 1.  If you didn't get a chance to see them, you can go here.   I had mentioned to you that I had some more great photos that I wanted to share with you.  So, as promised, here they are.

This room was a sitting room in one of the homes.  It was located on the second floor, just off the stairway.  I really liked the feel of this house.  The colors and combinations where very relaxing the way they were put together. 


The little girl's princess room had a few great things.  This closet door for one!  Created from two plain doors carved on the bottom and wooden scroll work for the top was a really creative idea. 


And I love the idea of adding a tutu to an accent table! 


I don't know if you can see to the right, but the headboard wall was painted with chalkboard paint.  I wish I could have gotten a few more photos of this room, but there were so many people walking around.  Not to mention, someone other than a child must have sat or laid on the bed because one end of the bed was collapsed ;)

The boys car themed room below has so many cool ideas!  I don't know if I would necessarily add them all in to one room, but it was sooo creative...


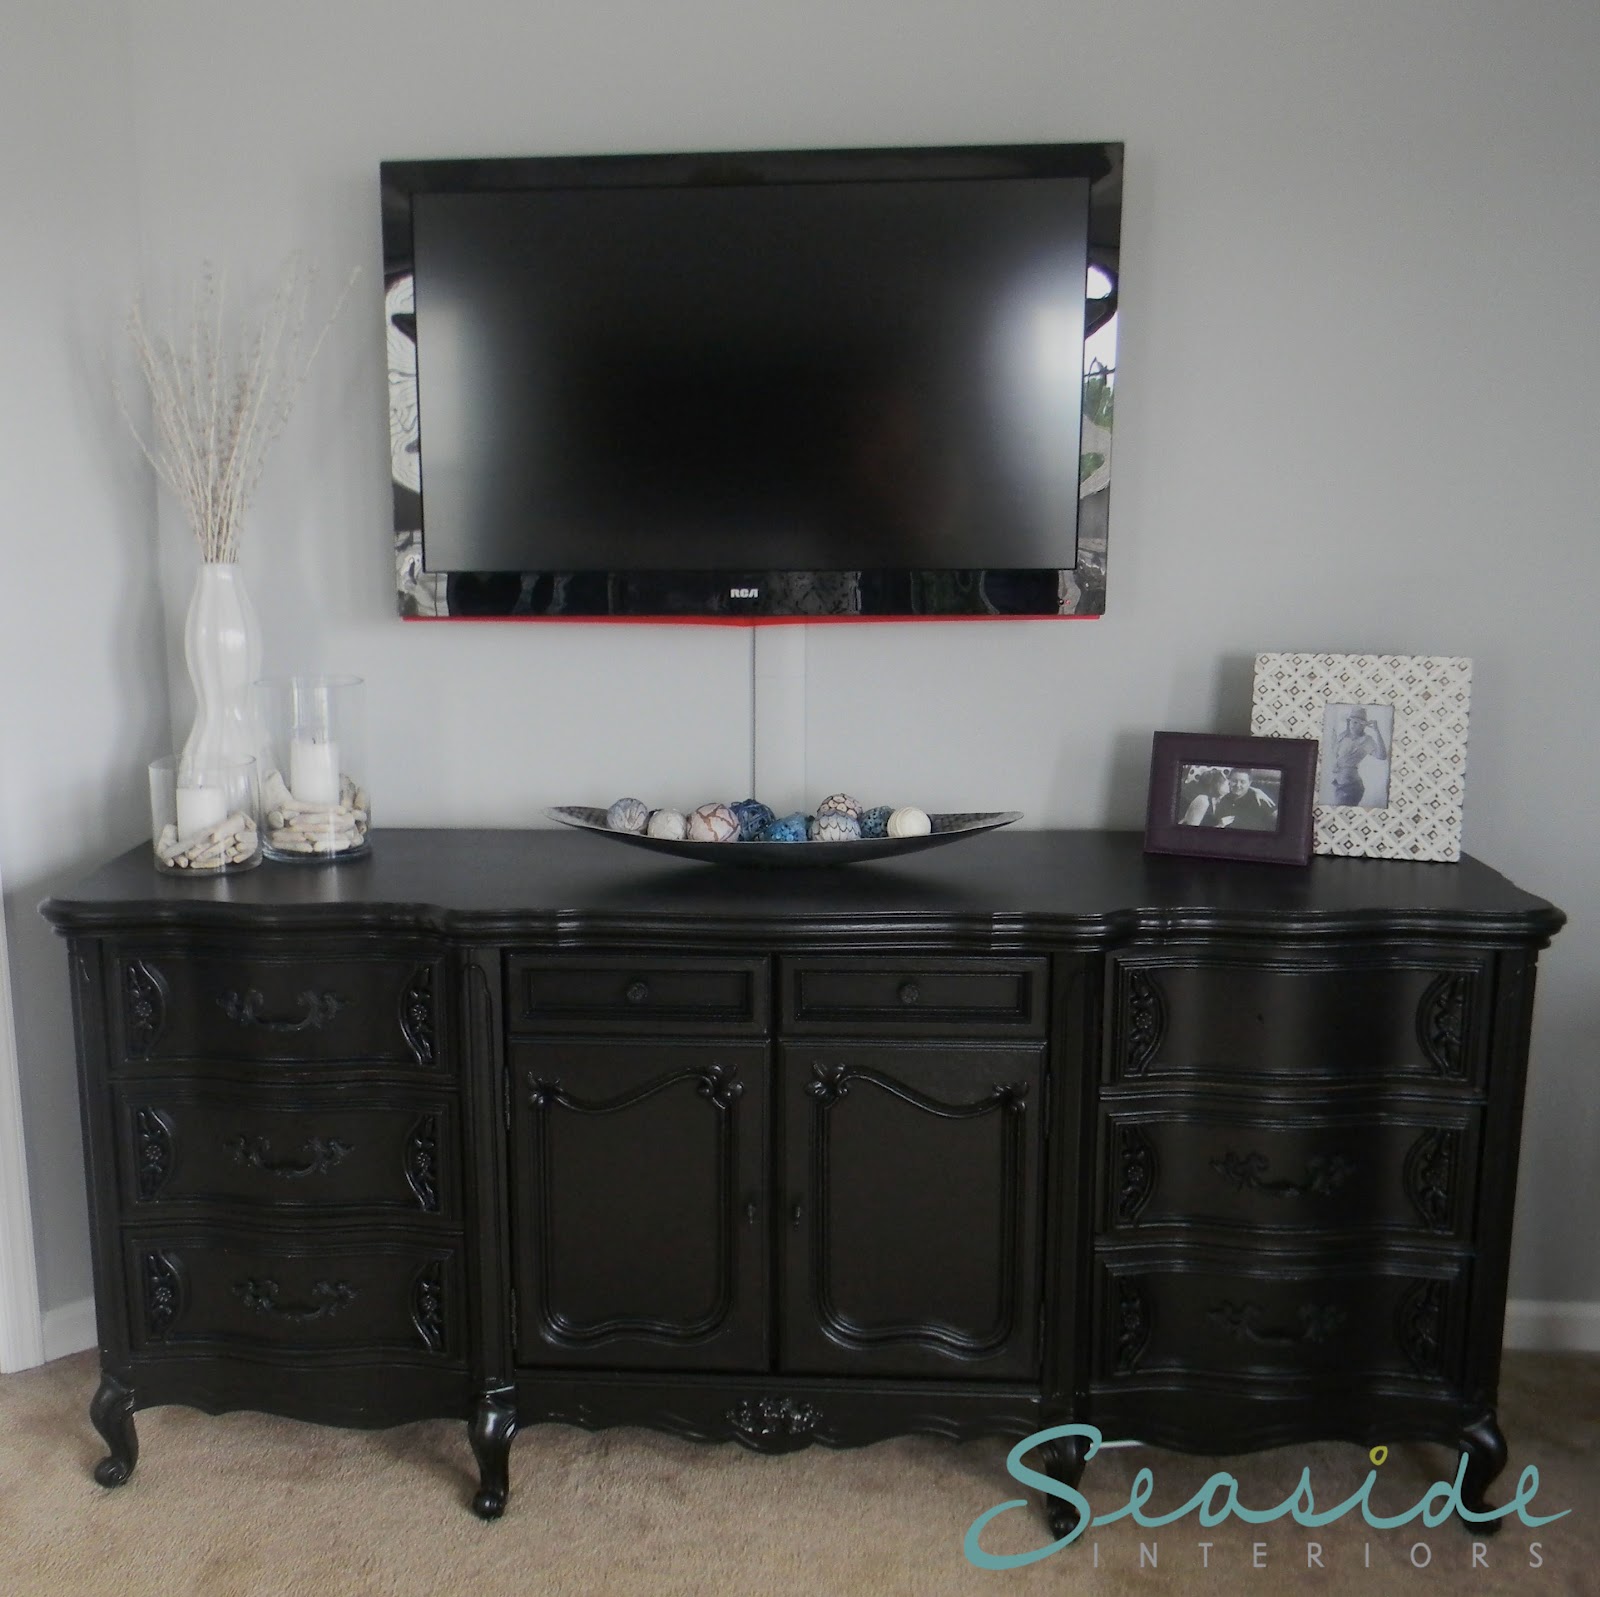
That's right, HEAD LIGHTS that turn on attached to a car grill on the front of a dresser.  So neat!  Then they finished with some pinstripes painted down the front of the dresser.  I like the idea of the mirror, but I think a larger sized mirror would have worked well with the silver mustang discs around it.


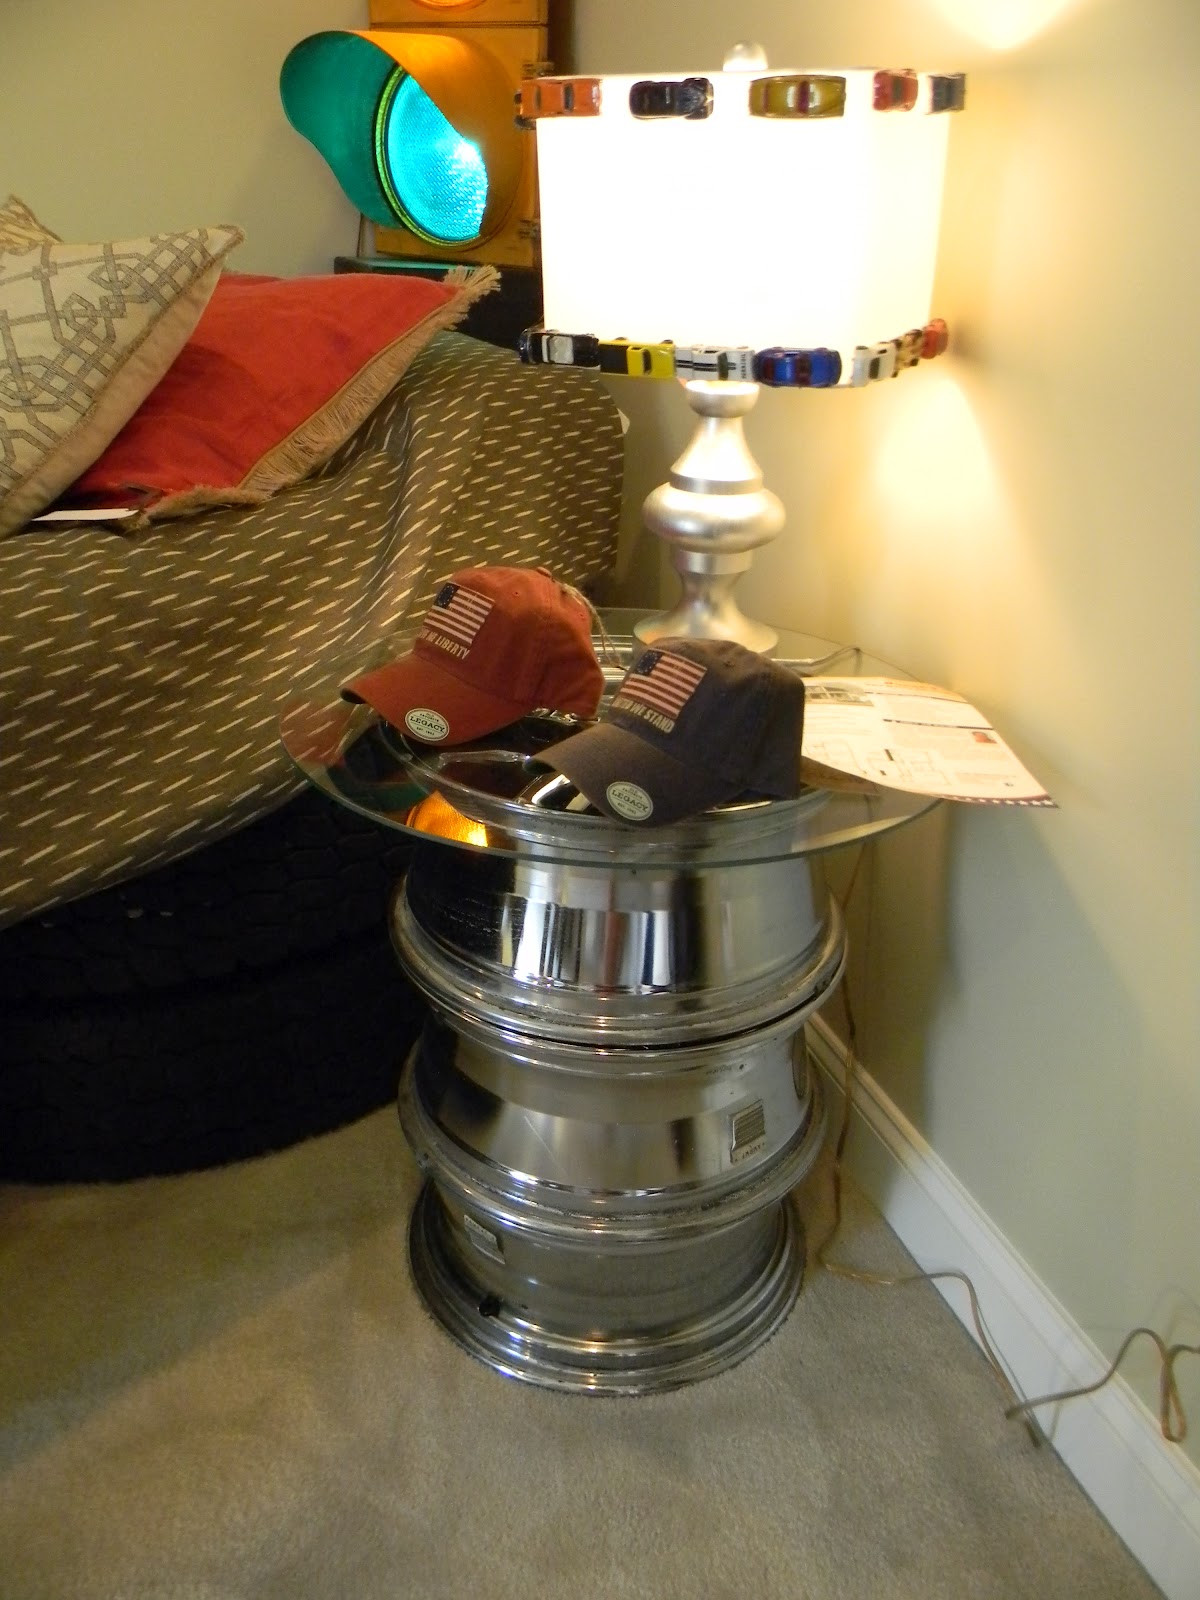
Another cute idea!  I like the silver lamp base and the white rectangle based shade that serves as a base for the adorable car trim!


COMPLETELY adore this tire tread metal frame or as my husband just told me it is called "Diamond Plate."  I call it how I see it, lol.  The enlarged antique car photo finishes it off nicely!


This is were the opportunity to do something different than a basic curtain tie back comes in to play.  One single headlight to hold the curtains back makes such a great statement!


This is such a creative way to bring a car's theme into a bedroom!  3 Car Rims with a piece of cut class for the top and you have a nightstand.


I am currently loving the color combo of navy, white, and red and I think the room below is great example of how to incorporate it in a beachy way without it being gaudy...


The red cabinet with the aged metal stool works really well together.


If you like more of a modern country feel, I think this room does the trick!

Look at the chunkiness of those placemats! 


My favorite style of furniture is currently the mix of wood and metal.  Like the dresser in the picture above and especially like the side table in the pic. below...


I want... I want... I want... My want for this table turns me into a two year with a nasty tantrum.  But have no fear, my budget would have a bigger tantrum if I purchased it ;-) 

You may notice tags on things in the photos I took.  Since we went on the last day, most things were for sale to purchase and take home.


I have an area in my crap room studio that I want to add one of these on either side of the walls.  Actually, now that I look at the picture below, the layout of this room is very much like mine.  The alcove and windows are all in the same place as mine too.  I want to add hinges though, so I can store things behind the shelving units.


I like the linen colored couches with soft green and yellow accents! 


There you are again MY FRIEND!  Did I mention it had the bent metal rivet edge look.  I'm sure there is a more correct name than the one I just came up with, but my husband hasn't looked at the screen and corrected me yet, so I am moving on, lol.


A very simple soft palette for a bedroom.


Here are some dining room areas that I liked along the tour...


I love this whole area!  I want to do something similar to this wall treatment with the white board and batten and sea grass wall paper in my front entry. 


What do you think of the bench added to the mix?  I think it adds dimension.  The chandelier is really pretty!  Don't ya think? 


OFF TO THE MUDROOMS...


 I love the painted beadboard on the back wall.  This picture is going in my mud room inspiration pics.  I love the different color ball hooks too!


Here are a few other things that I saw along the way that I would like to add in my house...


The Crawford  Ceilings.  These ones were very close to the ceiling, which I think makes them look a bit more modern and relaxed, which is the look I am going for.

We have already done the trim out on our morning room, which reminds me of the header on this doorway, but my goal is to eventually have all of the doors trimmed out like this.  Doors are cheap right ;-)   Why not throw new doors that have the inlaid panel like this on my list of wants, lol.  Christmas is only 5 months away, Dearest Santa...


Yup, and some transom windows to go above three of our entry doors.  A girl can dream, and this one seems to be in la la land right now.


Fireplaces are sometimes an afterthought, so this was exciting to see...


The last picture I wanted to share was the house that I fell in love with.

If I could pick a house, I would choose this one...


Right? IT IS GORGEOUS! I could sit here all day and ogle at it! All that trim work, the porch, the amazing windows, THE COLOR!!! If you just tilt your head a bit to the left, you can see that the side load garage looks like a barn entrance. I know, say no more, hmmm!!!