April 20, 2012

Guest Blogging

Today I have two things that I am really excited about! 

First, I wanted to share with you the painting that I redid, but that's not my big news ;-) 
The second go around of painting took me a few evenings after work to complete, but I really think it fits perfectly into our color scheme and decor!!  Most importantly, Dustin is happy with it!  So which picture did I choose to paint?


Mr. Octopus


It started with 5 pieces of wood...


Then I painted it the first time and it looked like this...


And finally, I finished with a fun "cartoony' version of an octopus...


I will share more in my next post about the hints and tips I used to create Mr. Octopus.

SO NOW, Onto the REALLY EXCITING NEWS...

I was asked by Erin at House of Turquoise to guest blog while she is in the process of moving into her beautiful dream home!

I have been following her blog for a long while now and it was such a treat to be asked to blog on her site.
SO TODAY, that's where you can find me :)  Come on over and visit her AMAZING blog and see my guest post :)

April 18, 2012

Everything Vintage!

How lucky am I to have such unique shops in my area?  Well I have mentioned in previous posts as to how much I luuuve the shop Everything Vintage. Co.  in Toano, Va.  Talk about Unique finds, they've got them.  There is even a room dedicated to Vintage Clothing with gorgeous dresses, pretty coats, and wonderful vintage accessories!  Not to mention the little storage area for all sorts of fantastic barn wood!

The great thing about the wonderful couple who owns the store is that they really enjoy what they are doing and it shows.  You just get a special feeling when you walk through their shop and chat with them about their different finds.  I really like that they take requests for things you would like them to search for on their adventures.  Last time I was in, I was able to request two old paneled windows for a future project.  I am not getting paid to talk about them, I just wanted to share where I find my awesome vintage items.

Last time I was there, this is what I saw...


Look at how pretty their sign is.


 I was able to purchase a few of their tin letters and numbers for a future project that I have in mind.


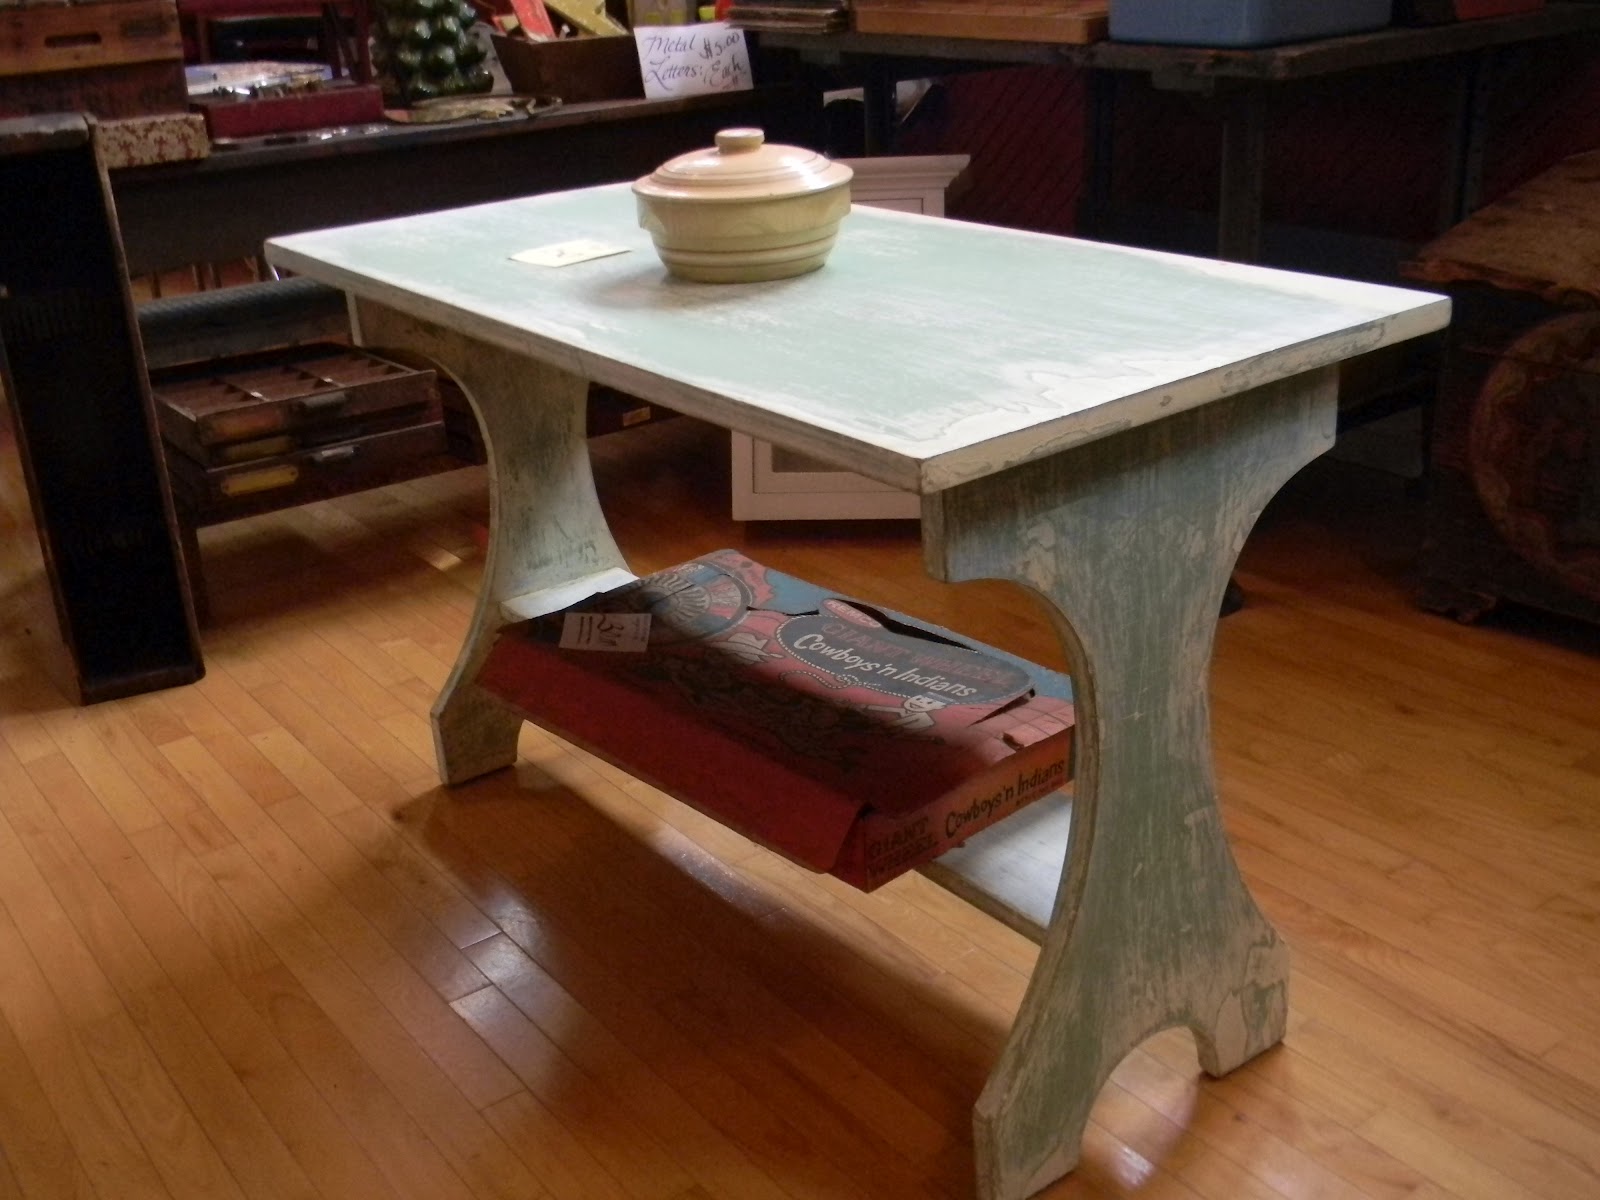
This is such a pretty finish on this smaller dinette table.  Just a nice blue and white wash.  This would look great with some relaxed cotton white slip covered chairs around it! 


What about using something like this in a garage, basement, or boys bedroom?  I think it would add a great deal of impact to any decor. 


This is the style of window I requested.  I am keeping my fingers crossed to see if they come across 2 of this type of window with 8 panes.  I have seen antique windows used in a lot of different home decor projects across blog land.  They are very versatile!   


 Anyone for a butcher block island or side table?  All I can say is WOW!  That is one thick piece of wood.  This would look great in a farm house!!


 Outside in their barn wood storage room.  I could spend a while in there picking through all of the neat pieces.


 The Lion, The Witch, and The Wardrobe?   We had these types of cabinets in England when I was little.  They were so quaint!  With a pretty finish you could put this in a guest room and I bet your guests would love it!


 And the piece de resistance, this Gorgeous farm house table!  The detail work brings the table up another level.  The picture does not do it justice.  I think it is about 10 feet long.  Again, this style of table paired with some beautiful white cotton slip covered chairs would be perfect.  Throw 3 vases full of green hydrangea down the center and call it finished :)

Come back tomorrow to see what picture I chose to paint and to see the completed Painting! 

April 17, 2012

Garage Organizing Inspiration

A lot has been getting done at A Brit of Happiness this past week!  I have nearly completed the panel painting for the Family Room (I'm so excited to share it in the next couple of days), the fence is coming along nicely, and the shed is close to the final stages of being completed.  Whew!

I don't know about you, but when we have a bunch of things going on, it is hard to keep everything in order!  This week it was the garage that was a complete mess!  From all of the power tools and wood for projects, to the kids bikes, scooters, and toys, we could barely even step over everything to get inside the house. 

I did take a minute or more like an hour or two on Monday to get it back in order, but I know that we are counting down the days until the shed is complete and we can move everything that does not belong in the garage into the shed. 

So this got me thinking.  I know we have a very limited budget, but I was trying to figure out what kinds of organizational pieces we could build or repurpose for the garage that wouldn't cost us a lot of money. 

I decided  to take a gander over at Pinterest, and this is what I found to help get us a little more organized.


scooter stand. awesome!
This would be great for all of our kids and their friend's scooters since they are always on their side across the garage floor.


Pinned Image
I am such a sucker for tin pails and chalkboard labels.  Fun and functional all in one!


Pinned Image
If you can't afford to splurge on the wall systems to organize all of your tools, then all you have to do is hang 1x4's or 2x4's on the wall and attach some pegs, and voila!


Pinned Image
I like the idea of having a rolling cart for recycle.   Wheel it out to the street and back in.  Dustin thinks I'm a laze bag for even posting this one, he he.


Pinned Image
Or you can go a cheaper route and organize your recycle bins on the wall.  If you like to keep things off the floor, all you would need is (2) 1x4's cut to size and nailed offset from each other.


Pinned Image

Lastly, Dustin and I have been discussing different ways to organize all of our Christmas and Halloween decorations.  I can't think of a better way than to build this simple system to keep your holiday decor up and out of the way until you need it.  It looks like all you would need to make each one is a 2x4 in the center and (2) 1 x 4's for either side.


I hope you have enjoyed some of the these simple DIY inspirational photos.  For some of the "how to's," check out the sources on Pinterest.

April 15, 2012

Repainting a Painting

We have been in debates as to wether or not to repaint my original painting that I did a few weeks ago.  Dustin said there was just something about it that didn't speak to him.  As I said before, he is not much of a complainer and just kinda' goes with the flow.  So, I thought I should give it another go and see what I can come up with. 

Here is the current painting...


I hopped on the internet to see what would inspire me and this is what I found...


Option #1


I adore seahorses!  I think they are so cute, so I would love to be able to create something fun and whimsical.  Maybe a few sea horses gliding across the painting, hmm.


 Option  #2


Option #3
           Source
I have seen this amazing painting all over the internet in the last few months.  Just gorgeous and it has the colors of my living room.  The chartreuse, white, brown, and turquoise. 


 Option #4

Surf 12.5" X 18.25" Print, --- JP 0071
This is the type of painting that I usually create.  Very whimsical, swirls, scrolls, and circles.  So who knows, since it comes more natural to me, I may stick with what I paint best!

 
 Option #5

Green Octopus
 How awesome is this Octopus?  If I went with painting the octopus, mine would definitely be more abstract, working with more of the shapes and not the shading. Why?  Cause I couldn't even begin to paint something with this depth of character!  But this guy is definitely a Contender.  Dustin said the Octopus is more manly than the Oyster!


This one is not in the line up, but he looks just like our dog Dozer just chillin' on the beach, I couldn't pass up posting it ;-)

So, now I am heading outside to repaint my painting.  What Option do you think I went with?  Come back soon and see which one I picked!