Showing posts with label inspiration board. Show all posts

April 12, 2013

Kitchen and Pantry Makeover

Hey guys, I had mentioned last week or so that I was creating some design boards for a mom in Oregon.  I finished work on her Family Room Design and after getting great feedback on it, I quickly got started on the adjacent kitchen and pantry.  

Anna has two boys running around the house, so she wanted to keep the fun and lively feel going into the kitchen while still not losing the style and feel she is going for.  

Working in the existing space, I wanted to give the room some character, but not have it feel completely different from the Family room.

To do that, I kept a similar color scheme.

Here is the finished results of Anna's kitchen design board...


Source List


I went with a different shade of gray from the Family Room.  For the kitchen I decided on Knitting Needles by Sherwin Williams.


I also went with the same gray curtains as the ones I chose for her Family Room since the large window in the Family Room and the sliding glass door are both close to each other.  When looking in from the hall, I wanted it to flow well from one area to the next.  

Threshold™ Jacquard Ikat Window Panel


My client has a kitchen table that she would like to repurpose.   I suggested painting it in a white finish and having the golden honey colored rug to go underneath the table and a smaller mat size to go by the sink in the same pattern.

Since she wanted fun, I thought maybe the pantry door would look great in a shade of turquoise like the inspiration photo I found from Tater Tots and Jello.  

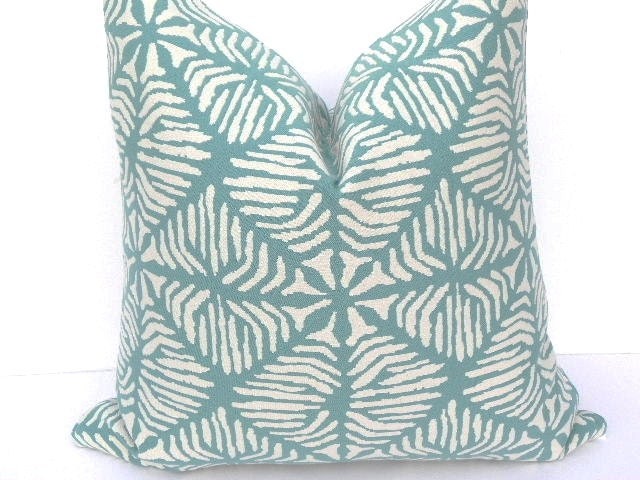
To tie in all of the colors from the design board and pull the curtains and even the wall color into the mix, I found this ADORABLE fabric from fabric designer Deborah Edwards.  It is so fun and playful! Anna is going to turn into a window valance to go above the kitchen sink.

Deborah Edwards - Feathered Friends - Vines in Multi


I chose a canister jar set in the same honey color to bring some of the color on to the counter top.  

3-Piece Canister Set (box Set) in the Sorrento-Wheat (gold) pattern by Signature


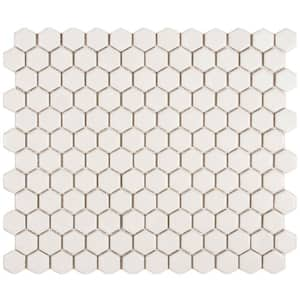
For the back splash tile, I went with a simple white mosaic tile that I think will compliment the cabinetry well. 
Merola Tile Metro Hex Matte White 10-1/4 in. x 11-3/4 in. Porcelain Mosaic Floor and Wall Tile

I think one of my favorite finds was the kitchen typography artwork for the walls.  

ON SALE Kitchen Art Print - Chevron, Baking Utensils, Zigzag Stripes - Set of 3 - 8X10 - White, Bondi Blue, Orange, Apple Green - No. KB008

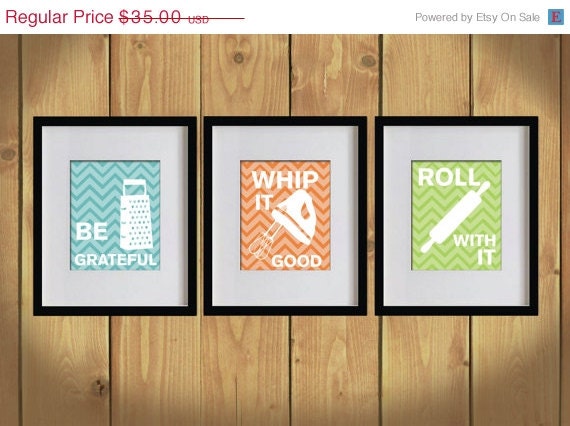
I recommended that my client stick with the turquoise chevron background for both pieces of artwork and then choose which kitchen utensils and phrases she likes best.  The Whip it Good one would either have me singin the "Whip It" song or my version of the Salt and Pepper song "Push Whip it Real Good, bom be dom bom be de de dom.  Either way, I'm sure my kids would be THRILLED with me singing "Whip It" every morning.  I'm gonna go with probably NOT, since my aunt so lovingly told my sister and I we sound like to Bleepin cats getting burned on a stove when we sing.  Aww, I love those truthful family members!

Anyway, I think the artwork is so much fun :-)

These will go on either side of the sliding glass door to give a punch of turquoise color to that area.

One of my favorite spaces to come up with some fun organization and design ideas is the pantry.  Check back for my next post on the cute little Pantry Makover Design I created for Anna.  

Have a great weekend!!!

If you enjoyed this post and don't want to miss out click up top there on the right and follow along ;-)


For information on my on-line design services, please click here.


For on-site design services {Greater Hampton Roads and Richmond Virginia}, please email seasideinteriors01@gmail.com for pricing and availability.


Seaside Interiors


March 31, 2013

Pottery Barn and Ballard Designs on a Target Budget

Happy Easter!!!   Hope you guys are having a great Easter weekend.

I thought today I would share one of several design board packages for one of my clients.

Most people are on a strict budget when it comes to decorating their home.  I know I am!   I am always  going for a high end look on a low end budget.  I splurge when I can if it comes to a statement piece, but the rest of the time I try to cut corners by doing DIY projects and finding knock-off versions for less.


I was recently contacted by Anna who lives in Oregon with her kiddos.  She wanted to have Room Board Packages, completed on a smaller budget, for several rooms in her home.

So we got started on the Family Room first.  Anna wanted it to be comfy, cozy, and family friendly.  She was not afraid to do DIY projects or find things second hand and re-purpose the items.   I designed the room around the idea that some items such as her coffee table and the fireplace would become DIY projects.

Here is the Design I came up with to accommodate her family...


Source List and Hints and Tips

White Bookcase

One of these on either side of the fireplace to balance out the wall over there.  Great to put some baskets on to store the kiddos toys, books and games.

Silver Mirror

To go above the white bookcase on the left of the fireplace.  It will mimic the window on the right to give the feel of a second window.

Basket for throws or kids toys

One of these next to the tv unit to put your throw blankets in or for more toy storage.

Ikea Frames
You will need three gray frames for over the tv unit.  Maybe some black and white photos of the kiddos to go in them.  Put the first one up centered over the tv and then space the other two out about 6 -8 inches away.

Artwork

This print is expensive so since you don’t mind doing a diy project, I would head to the craft store and get a canvas and some deep yellow, gray, black, brown, and white paint and a few brushes and just have some fun creating something similar to this.  I always add a tiny bit of black to colors like the yellow and mix them together so that they are not too bright.  Then for the gray you can mix in a bit of white to lighten it up.  I would do two different shades of gray and gold to add a bit of depth.  If you mess up, let it dry, and go over it a bit in the areas you don’t like.  To get the black trim around the edge when you are all finished painting it and it is completely dry, use some blue painters tape and a ruler and tape it off and then paint the black around the trim and on the sides of the canvas.  Just have fun with it.  Make sure the canvas is large enough to fit in that spot over the fireplace.

Rug
Definitely check craigslist or Homegoods for one.

Cloche
Would be nice on a console table behind the couch or on the coffee table.  Homegoods sometimes has them too.

Side Tables
On clearance right now for $55
One on either side of the couch.

Lamp Shade

Lamp Base

Curtains
If you don’t like the gray, You can even just do a plain linen colored curtain.  Check target they have them.

Pillows


HINTS AND TIPS
I tried to go with as much of Target’s version of Pottery barn style that I could as far as pricing for you.  Things like the storage baskets for the shelf or the larger one in the design board can be found at Homegoods, TJMaxx, or marshalls.  The pillows are a bit of a splurge but if you can’t purchase them then also check Homegoods,  Tjmaxx, and marshalls for similar ones.  Items like the bookcases might be found at Goodwill or other thrift stores.  Just make sure that they fit the space well.  You want them to have a built in look so as close to the size of the space as possible.  You may just need to put a coat of white paint on each one if you find it at a yard sale or something.

I would paint your tv unit black and get another two of the brown basket that you have on the left of the tv unit in the picture you sent me to add to the unit.

I would also suggest finding a simple shaped rectangle console table painted in a natural wood to go behind the couch underneath the windows.  You can put a few stacked books off to the right with a cloche on top of the books with some greenery underneath the cloche.

I would paint the coffee table white if you are keeping it as is with the glass in it or I would paint the legs and base a dark brown, have a piece of thin luan wood cut to fit (lowes does the cutting for free or extremely cheap for you) and then do a diy tufted ottoman like this link: http://www.homewithmandy.com/2012/02/diy-coffee-table-to-ottoman.html

I would do a plain linen colored fabric with the brown legs base.
Put the white dish on the top of the right bookcase and then the vase on the top left of the console table that’s behind the couch.  Add some fake branch flowers similar to the ones you can find on pottery barn.  I know that Target is currently selling the cherry blossom type branches in store so you may want to check them out.

Bring in your clear glass candle holders to reuse and put them on the top of the white bookcase that is on the left side of the fireplace.  Put the larger candle holder far left and have the smaller one just next to it put more forward than the larger one.  Fill the vases with Epsom salt and candles.

For the fireplace, you can take off the top shelf piece and replace it with a large piece of reclaimed wood or get a piece of lumber cut to fit from lowes or home depot and stain and paint to look like reclaimed wood.  For the sides of the fireplace, I suggest framing it out similar to the picture I chose for the design board and then adding new tile in the sea glass color that I suggested.  There is also subway sea glass if you would like it to look larger.  I can send a link to a couple of the sea glass ones that I like if you want to go with something like that.  For demolition, all of the original tile will need to be taken down.  It would be great if you could take the wood look all the way up and paint it out white like they did in the image.  Depending on the amount of work you feel comfortable doing, you may want to hire someone complete the fireplace project for you.
If you have any questions regarding anything, please feel free to contact me, thanks so much, Helen

The After pics of Anna's Family Room are not here yet since she is in the midst of the Family Room Makeover, but here are some of the Before pics she sent me so that I could get started on the design...

 This is the wall looking into the room.  Anna was really hoping to change up the fireplace design. Since there was only one window on the right, I came up with a design that would balance the room out by placing a bookcase on either side of the fireplace and adding a mirror on the left hand side to give some reflection similar to the window on the right.


 This tv unit will be painted black and will possibly have some black and white pictures placed inside gray Ikea frames on the wall above.


The white sheers will be replaced with these pretty gray Threshold drapes from Target.

Threshold™ Jacquard Ikat Window Panel


Here are the Target bookcases that I think will fit well on either side of the fireplace.

Threshold™ Cottage 2-Shelf Bookcase - White


Last One-Both Sides-19x19-(fits 20X20 Insert)Decorative Pillow Cover-Geometric Diamond Print Home Decor Fabric-Turquoise-White-Throw Pillow


A fun patterned pillow that will accent each end of the couch.


Black Walls Rustic Fireplace

Here is the inspiration for the fireplace.  Although Anna doesn't need the pretty platform base, this will at least give her the option to create a similar finish to her fireplace.

Next up is the post for the kitchen and pantry design to accompany this family room!

If you enjoyed this post and don't want to miss out ;-) click up top there on the right and follow along ;-)


For information on my on-line design services, please click here.


For on-site design services {Greater Hampton Roads and Richmond Virginia}, please email seasideinteriors01@gmail.com for pricing and availability.


Seaside Interiors


Linking up to:

The Chicken Chick

March 12, 2013

Sophia's Big Girl Spring Inspired Bedroom Makeover

Today I wanted to share an Online Design Board that might just get you in to the spirit of Spring!!!

I was contacted by a lovely lady who was looking to have her daughter's room transformed from the toddler stage to a beautiful Big Girl Bedroom!  On the list of wants for the room, she said that her daughter really loves nature, but she wanted to bring that in to the design in a girly way.  I was pretty much starting with a fresh palette except for one dresser in the room that will become a DIY project.

So here is what I came up with for Sophia... 

 
The starting point for me was a pillow I came across on Etsy and just fell in love with it!  I decided to keep the walls white and have the color come in with all of the furniture and accent pieces.  The dresser that is currently in Sophia's bedroom is similar in shape to the one in my design board so a little DIY paint project with new hardware and it will feel like a whole new piece of furniture.  I really like how it all came together with the touches of birds and owls and Spring time, but still giving her the girly space to grow in to.
 
I hope you like the fun Design Boards that I have had the opportunity to share.  I am having a blast creating them.  Last week I received a request all the way from AUSTRALIA to create a soft palette Nautical Nursery Design Board for a soon to be baby boy.  Ahhh Australia!!  I am so excited!  The room is just about complete and should be posted this week. 
 
Source List For Sophia's Bedroom
 Jenny Lind Style Twin Bed Frame
 Birdy Wall Art
Pink floral Pillow
 
Pottery Barn kids Owl Bookends
 
Pottery Barn kids Clock
 
Pottery Barn Teen Quilt
White Umbra Wall Flowers
Spello Arabesque Rug
 
 Dresser Inspiration
 
Aqua Frames


If you enjoyed this post and don't want to miss out ;-) click up top there on the right and follow along ;-)


For information on my on-line design services, please click here.


For on-site design services {Greater Hampton Roads and Richmond Virginia}, please email seasideinteriors01@gmail.com for pricing and availability.


  If you would like to order an Online Design Package for a room in your home for the sale price please email me at seasideinteriors01@gmail.com.
 
 
Seaside Interiors


Linking To:
 

March 01, 2013

March Madness Sale!!!


The other day I came up with the idea that I wanted to do a fun sale just for the month of March, so this is what I decided...


So for the whole month of March I will be creating design/mood board plans for half off.  The Design Board Package includes:

The Inspirational Design Board (To give you a full visual of the project)
The Room Layout (For all furniture placement)
The Complete Source List for the items on your Design Board (So you know exactly where to purchase your items)
Instead of the Design package costing $150 per room, it will be $75.
If you add a second room to the list I will take an additional $10 off, so you can have two full Room Design Packages for $140, which is less than the price of one regular priced Design Board!
Examples from My Design Board Portfolio


It is really simple to place your order.  You can click on the side bar for which Design Board Option you would like to purchase.  For the next step, just send me an email to seasideinteriors01@gmail.com letting me know which option you are going with and we will work together to create the Design Board that fits your lifestyle!
Seaside Interiors

October 02, 2012

Relaxing Earth Tones Living Room Design Board

I can honestly say, I adore my job!  Number one, to be able to help someone transform a space in their home that allows them to really have a unique place all their own, is so much fun!  Another reason I love it, is that I get to express my creative side, which is constantly screaming at me to do something ;-)  So it is a win win for me!

This week I am working with a new client that loves reds and blues and wants to tastefully incorporate that into a sort of French Country Cottage feel.  So, I am working on that as I also finish up a design board that is inspired by Earth Tones that I want to show you.

Today's online design board that I am sharing with you is for a wonderful couple with two young children.  They have a living/family room that they are working on transforming into a more formal feeling space.  The existing space is done in greens and browns and the clients want to keep the existing color scheme.   Since the walls already have all the color the room needs, I wanted to keep the palette very light and airy and bring in a little of the wall colors to help soften the space.   I decided to bring in a more neutral beige shade and also a deep blue to add some depth of color.  One handy dandy tip is that if your walls are full of color, then always bring in lighter furniture decor and visa versa, if your walls are light, then add a punch of color with darker furniture.  It is always a nice contrast!

Here is the design board that I created...


Source List

Home Decorators Collection Panorama White Rectangle Sofa Table


THANKS for stopping by and feel free to leave a comment if you have any questions!


If you are looking for a design board to get you started on your home, please send me an email to seasideinteriors01@gmail.com.


September 26, 2012

More fun with Project Decor!

I had a lot of fun yesterday working on a board for Project Decor!  I came across an inspirational photo online this morning, so I decided to use it to create a fun mix of color in a bedroom atmosphere! 
 
Here is my mix of turquoise, red, and gray...
 
 
I hope you enjoy seeing these design boards as much as I enjoy creating them :)
 
I am currently working on two fun design boards this week for some new clients.  Hopefully I will be able to have the first one ready to share by Friday!
 
If you would like an inspirational room board created for a room in your home you can contact me at seasideinteriors01@gmail.com or hop on over to my website Here for pricing and examples of previous room boards. 

July 13, 2012

Living Room Inspiration Board!

Hope your week went well, mine was busy but a lot of fun..  I wanted to share with you a design  board that I created for a new clients' living room.  The design for this one was a Simple and Relaxing contemporary living room utilizing their existing couch and adding a lot of new accent furniture and decor in blues and greens.  The blues and greens are right up my alley since those are the colors that I have been decorating with in my own home over the last several months. 

Here is my idea of a relaxed style living room...


Today I got started on purchasing some of the room decor and furniture.  I found one of the two side tables, although mine is just a bit different, so I will spray the metal frame black on the one I found.  I just have to search for its twin.   I also ordered the upholstered chairs and beautiful accent pillows for the couch.  So, I feel like I got quite a bit accomplished today, YAY!  

I also have several DIY's to do on this room!   

There are pillow covers to make for the clients' existing couch cushions to go along with their new cushion covers I purchased today, a piece of artwork that I need to paint, and the verdict is still out on whether or not I will be making the curtains or purchasing them.  I wanted to at least  have 95" height on them and so far, I have searched and all I can find is the 84" in this specific color.  I will keep you posted on the details!   

I am now heading to bed since my kids have had three days of having friends sleep over and I am slightly exhausted ;-)   I hope you guys have some fun and relaxing things planned for your weekend, we are headed to a pool party tomorrow and a birthday party Sunday and I'm even gonna try to sneak in some bowling with my sister and my hubs.  Take care for now!