Showing posts with label Lego Party. Show all posts

January 15, 2013

The Last of the Lego Party Tutorials: Goody Bags!!!

I hope you are having a great, what day is it?  Tuesday.  Sure let's go with it.  I have one last Lego Friends tutorial for you today.
I previously posted about the Lego Friends Chocolate Molds, the Lego Friends Birthday Party, the Lego Friends Oreo Truffles, and today I am finishing up with the Lego Friends goody bags!


Party Supplies
A round circle cutter approx. 2 inches
A cutting mat
Scissors
2 Paper bags (to complete each bag you will need 2 bags)
Adhesive Foam Circles
A black pen
 A close up of the foam adhesive circles you will need to attach the Lego circles.
Each pack came with 10 paper bags, 5 of each color.  Since I just needed 2 of each color this worked perfectly for me.  If you don't want to end a paper bags life, close your eyes now!  I cut up two bags which gave me four total squares to cut from.  If you can't cut up the bags, then maybe using matching card stock in the same color will help you through it.  It was only about $4 for 10 bags at Target in the party section.
I took one of my circle cutters, about a 2 in. cutter I think, and cut out the 8 circles I needed for each bag.
I then took a pen and wrote the word Lego on the middle of each circle.
 I flipped over the circle and pulled off one of the sticky sides on the foam circles and placed it in the center of the circle I cut out.
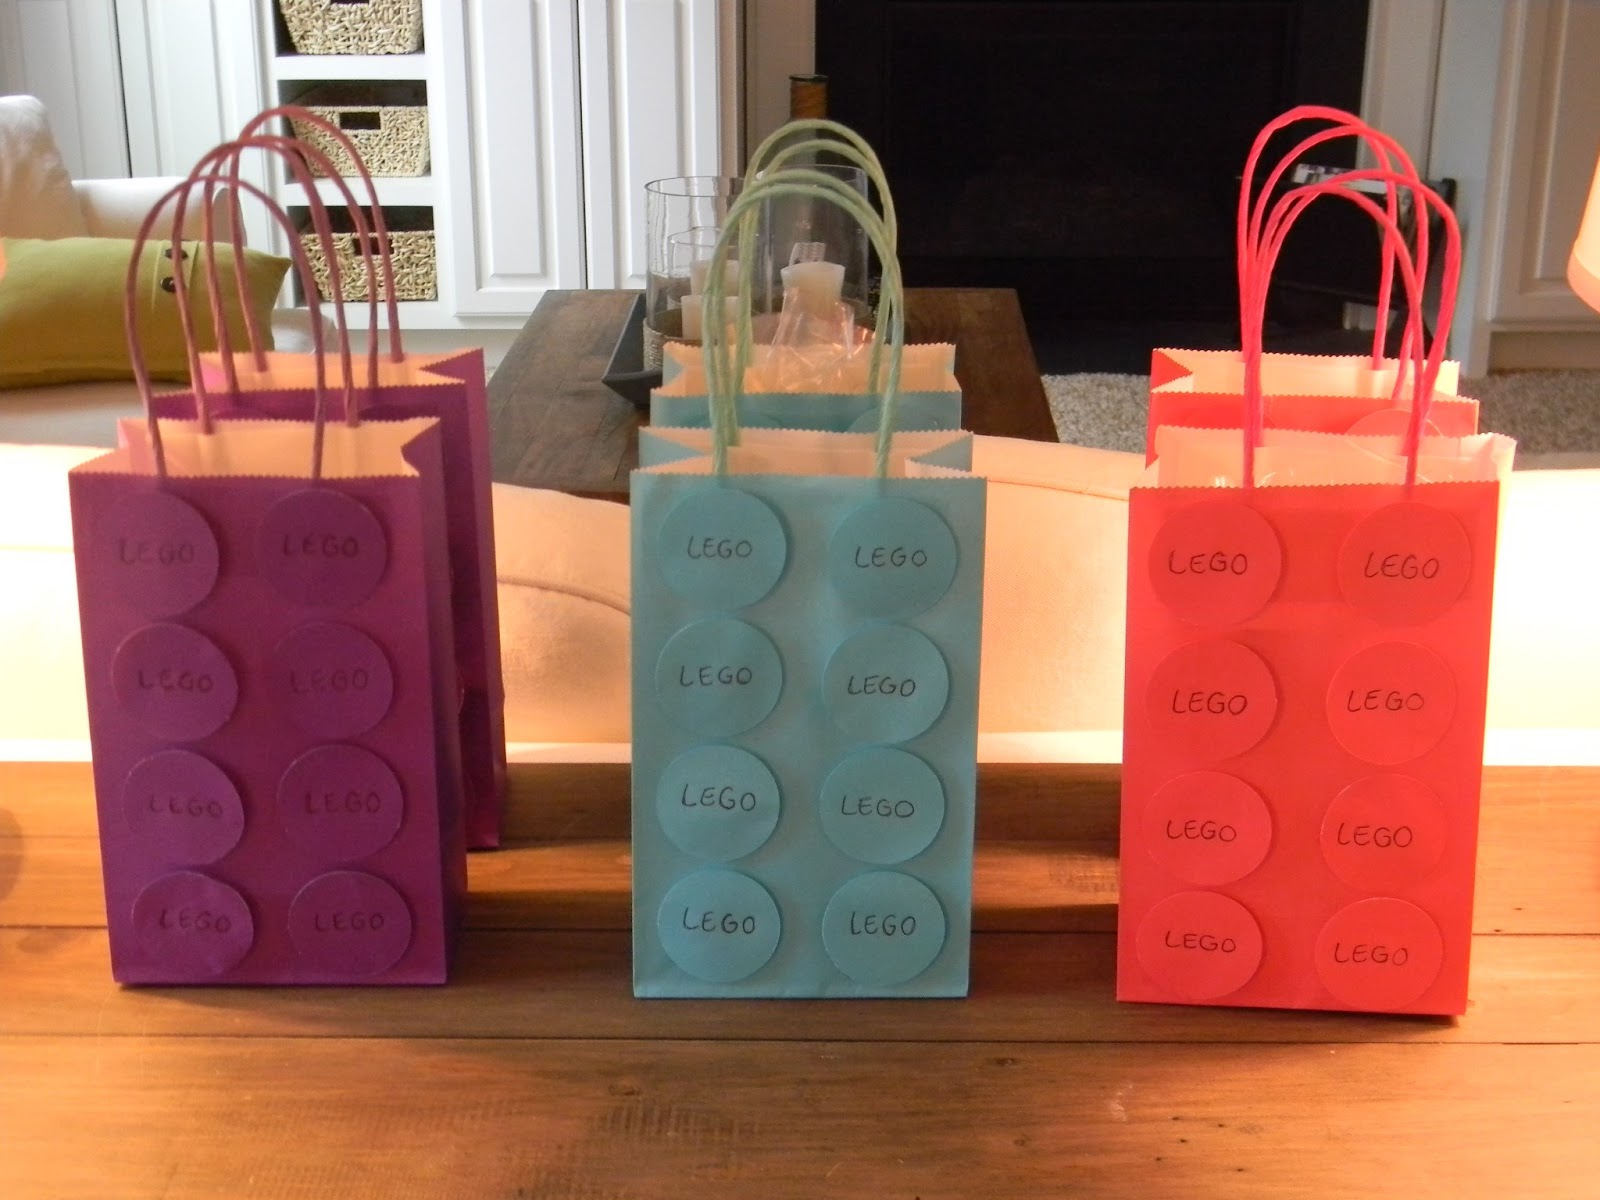
Peel the paper of the sticky circle and attach it to the bag being careful that they all line up. 
 Then you have a finished Lego block bag!!! Ta da!
 Here they are waiting to be filled.
 We found a few awesome Lego Friends Party Supplies while searching for the paper bags at Target.  I had no idea that there were even Lego Friends Party Stuff out there, did you?  So cue the image of my daughter and I jumping up and down and squealing in the party section of Target.   We found Lego Friends Pencils, Erasers, and adorable notebooks with two different cover options. 
 Here is the other cover option of the notebooks and closer shot of the erasers.  We also added the Lego Friends chocolates that we made for the goody bags.
 And a pink LEGO cookie, tied with a LEGO ribbon, (you see where I'm going with this), inside a LEGO bag!  Yep, we were happy campers, lol.
  
Please let me know if you like me sharing all these party posts along with my decorating posts.  I think they are a lot of fun, but I'd love to hear your feedback.
Hope to see you back here tomorrow when I share some of the items I purchased for my next client's living room install!

For information on my on-line design services, please click here.
For on-site design services {Virginia}, please email seasideinteriors01@gmail.com for pricing and availability.
Seaside Interiors

January 14, 2013

Lego Oreo Truffles

To continue the run on the Lego Birthday Party, I am sharing the "How To" on the Lego Truffles.  If you missed it, you can check out the Party Reveal HERE  and the Lego Friends Chocolate Mold Tutorial HERE.   I know I said that I was gonna do the goody bag tutorial today, but I thought I would switch it up on you and keep things fresh ;-).  The kids were thrilled to have the Oreo truffles turned into Lego treats, so let's get started.
 
 
Lego Oreo Truffles


       Ingredients
 
          2 Bags Pink Candy Melt
          Lollipop sticks
          1 Pkg. Oreos
          1 Block Cream Cheese 
                 Pink and Black Candy Coloring (Below)
             Wax Paper (Not shown)
              Icing bag (Not shown)
             Tip #2  (Not shown)


 Steps to Make the Truffles
 
Throw the pkg. of Oreos in your food processor. 
If you don't have a food processor, just use a blender and put the Oreos in in small batches.


Pulverize until it becomes crumb like.
 
 
  Add the cream cheese to the food processor and mix.
 
 
I know this doesn't look very yummy, but it is!   
 
 
Have a cutie patutie help with this part, it will be way more fun!   Put the mixture on to a piece of waxed paper and form into a rectangle.   
 
 
 The rectangle is nearly formed and now needs a little prettyin' up.  
 
 
            Take a second piece of waxed paper put on top of the rectangle and flatten out the top with a rolling pin to make the top flat.
 
 
Take a dough scraper or knife or whatever straightening tool you can grab and push inward against the sides to straighten the edges.
 
 
Viola!   Now take the slab of Oreo yummy goodness and put it in the refrigerator or freezer until it is firmed up.  I put mine in the freezer for about 10 minutes or so.  
 
 
While the Oreo truffles are firming up, let's get the chocolate melted.


Microwave them on defrost and check back every minute or so and stir them each time until it is completely smooth. 
 
 
Add enough pink candy coloring to get it to the hot pink that you are looking for.  I always add just a smidge of black to tone down the brightness of the pink.  Put the chocolate to the side and get your Oreo slab.
 
 
Start in the center and cut even squares. 
 
 
 It should look like this when you are done.
 
I always think I have taken pictures of every step but I seem to always miss one.  Sooo... for the next step, take a lollipop stick, dip the end of it in the melted chocolate and place in a square of Oreo truffle.  Repeat for all the other squares.
 
At this point I put the tray in the fridge to stay cold and just take out about 10 at a time to dip in chocolate.  If I kept the whole tray out, they would be mushy and falling off the stick when I tried to dip them so this always helps me.


 I just rotate the rectangle and dip each side until it touches the lollipop stick and then place on a clean sheet of waxed paper to harden.
 
 Now that you have dipped rectangles, let's turn them into Legos.
 
I take an icing bag with a #2  tip on the end and fill it with chocolate.  Then I proceeded to make two rows of four dots on each brick.  When the dots have been sitting for a minute or two, I use my finger to push the peaks down to make the circles.
 
 
 If you want to add a finishing touch, then you can add a little Lego Ribbon bow to each one with a dot of hot glue and call it done!  I found my Lego ribbon Here on Etsy.

 Come back tomorrow for the Goody Bag tutorial and all of the fun stuff we put in them!
 

For information on my on-line design services, please click here.


For on-site design services {Virginia}, please email seasideinteriors01@gmail.com for pricing and availability.
Seaside Interiors


January 10, 2013

How to Make Chocolate Lego Friends Shapes

Today I worked on getting a few things off my list for my daughter's birthday party this weekend.  I find it a little easier to get a couple items knocked off the list each day rather than waiting until the weekend and then having to do everything.  That thought is quite funny to me since I am a true procrastinator when it comes to parties, and cakes, and cookies, and ok, all the rest ;-) 

So for one part of my New Year's Resolution, I am working on procrastinating LESS, because, well...  let's be honest,  I couldn't imagine not procrastinating a little hear and there, LOL. 

For the fun part of my day, I decided to go ahead and take care of the chocolates I am making for Lacey's goody bags.   Since her party is the Lego Friends Theme, I purchased some girly Lego themed ribbon on Etsy.  You can purchase it here if you are interested.  I also ordered a Lego Friends Ice Cube Tray from Amazon.  The link for that is here.   I figured, not only can I make some chocolates for their goody bags, but I can also use the same mold to make Lego jello jigglers, or other party shaped foods.   One mold, lots of uses, and especially helpful on a tight budget!

To make the chocolate, here is the list of items you will need:


One bag of pink chocolate discs (Purchased from Michael's Crafts)
One bag of purple chocolate discs (Purchased from Michael's Crafts)
Candy Color Multi Pack that includes purple, pink, and black (Purchased from Michael's Crafts)
Lego Friends Mold (Purchased on Amazon)


One double pack of plastic squeeze bottles. (Purchased at Walmart)


Step 1
Melt the chocolate discs on defrost in my microwave for several minutes.  Just keep checking and stirring the chocolate until it is super smooth. 


Step 2
Add Candy Color until desired color is reached.  Since I was going for really deep purple I had to add several drops.


Step 3
If you need to, add Black Candy Color to deepen the brightness of the pink or purple and stir into the color.  I added two tiny drops of black to the pink batch to reach my desired color.  The purple batch was fine without adding any black.

Step 4
Add the chocolate to the plastic squeeze bottle.  Squeeze the chocolate into each mold until it just about reaches the top.  Don't worry about getting it in every crevice because the next step will take care of that.  Just pour it straight in the center and fill each mold up.


*In my first attempt, I decided not to fill them all of the way up and when I popped them out, they broke, so definitely fill to the top of each mold.

Step 5
Very important: Bang the tray on the counter to get out as many air bubbles as possible. 

Step 6
Throw it in the freezer for at least 10-15 minutes.

Step 7
Bend the mold and pop out the pretty little butterfly.


Step 8
Enjoy!!!


 At this point, you can serve them on a tray like this for all the little Lego Ladies to eat.  Another option is that you can put them in little baggies and tie a Lego ribbon around them as a take home goody, which is what I am gonna do.  If I have time, I will put a little label on the bag.


For information on my on-line design services, please click here.

For on-site design services {Virginia}, please email seasideinteriors01@gmail.com for pricing and availability.
Seaside Interiors


January 06, 2013

Lego Friends Party Mood Board

Ok, so if you checked out the post from yesterday, I did a surfer girl room board for one particular little lady, my daughter.   And today that little lady is turning 9 years old.  As you know kids turn 9 well, in the blink of an eye. 

So now we have the birthday party plan.  This Saturday, Lacey is going to have a sleepover with 5 girls.  I'm sorry, I mean 5 GIRLS!!!  Am I crazy?  YES.  Did I say no more birthday sleepovers for a few years?  YES.  Am I a sucker?  Well...  YES.

The theme for the party is Lego Friends.  Most mood boards I do are for customers that want a inspirational design board for a room in their home, but I just kinda' thought, why not do it for the parties I create for my loved ones too.  I usually have all sorts of ideas rolling around when I plan a party, so this helped me see it as a whole.  It totally took the stress out of trying to remember what I had to complete for the party.  I don't know why I didn't think to do this sooner. 

Here is the Lego Friends Party Mood Board I created...
Sources


http://www.etsy.com/listing/92879904/building-blocks-birthday-invitations?ref=sr_gallery_5&ga_search_query=lego+friends+invitation&ga_view_type=gallery&ga_ship_to=US&ga_search_type=all


For information on my on-line design services, please click here.
For on-site design services {Virginia}, please email seasideinteriors01@gmail.com for pricing and availability.
Seaside Interiors