Showing posts with label Beach Coastal Bathroom. Show all posts

February 09, 2013

Kids Coastal Bathroom Design Board

I hope you guys are having a great Saturday!  I just wanted to share a quick post for our kids bathroom.  I have been working this week on purchasing items and putting together the design board.  We are getting started next week.  I can barely stand it!  I just want to see something get torn down. 
 
 
I will share much more this coming week.  We are getting ready to head out the door to purchase a few more items for the bathroom and the paint for my mom's house since we are starting over there next week too.  I showed my mum the design board for bathroom and she really liked the color I chose for the walls which is Repose Gray by Sherwin Williams.  So, we talked it over and decided to also go with Repose Gray for my parent's house too.
 
Here is the design I came up with for the bathroom...
 
 
I really love the look of Navy and White with a fun accent color.  I think the kids really like it, so that's a plus.  :0)  Do you think this would be a bathroom your kids would enjoy? 

Source List

http://www.westelm.com/products/stripe-shower-curtain-b566/
http://shabbynest.blogspot.com/2012/04/navy-and-white-bathroom-reveal.html
http://beckdesignblog.blogspot.com/2011/07/blakes-bath.html
http://www.lowes.com/ProductDisplay?partNumber=400571-18573-LW12270132DS&langId=-1&storeId=10151&productId=3700094&catalogId=10051&cmRelshp=req&rel=nofollow&cId=PDIO1
http://www.art.com/products/p14527666663-sa-i6755255/rodney-white-aren-t-you-crafty.htm?sorig=cat&sorigid=0&ui=A7D107C297A643D59C5C2F624B8FA29F


Since the redecorating starts at my parent's house on Monday, we are trying to work our own renovations in between.  So, we have Wednesday the 13th as the beginning stage of work on the kids bathroom.
 
Plans for the bathroom
 
Board and Batten wall treatment
Painting the Cabinet a Navy Blue Color
Adding bead board treatment on the ceiling
Bringing the Tile up the rest of the wall in the shower area
Installing shelving behind toilet
Installing two new coastal style lights above sinks
Installing one inset light in the shower area (It's kinda dark in there)
Installing Slate Tile floor or a different tile (I am still in debates over this)
Adding artwork and accessories
Adding hooks to board and batten
 
Getting a big glass of wine when it's all done and hang out in the bathroom admiring it, since the rest of the house is not quite finished ;-)
 
If you enjoyed this post and don't want to miss out ;-) click up top there on the right and follow along!
 
 
For information on my on-line design services, please click here.
 
 
For on-site design services {Greater Hampton Roads and Richmond Virginia}, please email seasideinteriors01@gmail.com for pricing and availability.
 
Seaside Interiors

Linking to:
 

March 14, 2012

First Floor Beach Coastal Bath: Part I


When it came to the first floor bathroom, I knew I wanted to continue the flow of a light and breezy beach house.  I knew I wanted white trim and touches of the sea.
When I went looking, I came across some wonderful inspiration! 

I knew I wanted to bead board the ceiling after seeing what Shelley on House of Smith did to her little girls bathroom ceiling below.


For an AMAZING step by step process, you can check out Shelley's tutorial here.

I also knew I wanted to go with board and batten walls.
So I searched around on Pinterest and found this room.  It spoke to me! Build me Helen, it said!

Pinned Image
Source: One Nutty Girl via Pinterest

 Check out One Nutty Girl for the step by step of how she put together her wonderful board and batten wall.  It's awesome!

For my board and batten design, I can't get away from wanting thick boards. So, I knew for my design I wanted to have really thick top and bottom boards and wide wall boards.


I searched high and low for a color that said beach, and of course I found one in the turquoise family.  I know, go figure, I always go back to turquoise.  There were a few colors that I really liked, but inevitably, I chose Tidewater by Sherwin Williams.


So this is what we started with...


First we painted the walls.  We didn't stop halfway down since I didn't know when we would be putting up the board and batten ;-)


The next step was to rip out the base boards.


Here is a shot of the ceiling before we put the trim and bead board up.


And here is a shot of the ceiling nearly completed with the trim and bead board nailed up!  Any takers to spackle and sand??  Hello, are you still here?   Well, it is definitely not my fav. part, but well worth it in the long run. 


Here is the 7 in. Base board.  I went with a 7 in. base board because eventually I want to put hardwood floors down which will bring up the base to about 6 in.  I think it is key to make sure that the whole vision of a room is factored in all steps of a project, so that in the end, you don't have to back track or redo parts of a project.  Definitely a money/time saver in the long run! 

After the base board went in, the top board and ledge were next.

Finally the bathroom window framing was completed and wall boards went in!


Again, here is what the bathroom looked like at first...


And here it is Now...

 I love "me" some trim work!!!


     Here is the finished ceiling after a loooot of spackle and sanding!
 Sorry for the glow in this picture, my bathroom is just so much happier now, it SHINES, ;-)

 A little closer shot of the window.  I think the window frame out is my favorite part of the bathroom renovation so far!  A cute petite window!


 This pic is most true to the color you see in person.


 Now I need to find some inspirational pieces to finish things off!   

High on the list is new lighting, a mirror, and a new vintage vanity.   ???  New Vintage Vanity (that might be a little contradictory)  ;-)

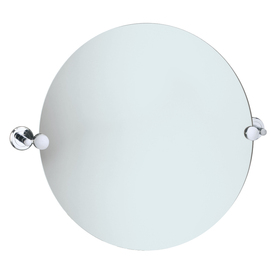
 Gatco 19-1/2"H x 19-1/2"W Latitude 2 Round Frameless Bath Mirror with Beveled Edges
I really like this mirror from Lowe's.


Here are a few of the lights I am considering.  If I go with the first light, I would put it directly over the mirror, like the picture below.  If I went with something like the second light, I think I would purchase two
 I think they would be nice, sorta elevated on either side of the mirror.


Here are some more inspirational pictures I have collected over time.  I am sure that most of them are from Pinterest, but I just saved them into a folder on my computer, since I hadn't planned on starting a blog until recently :-)


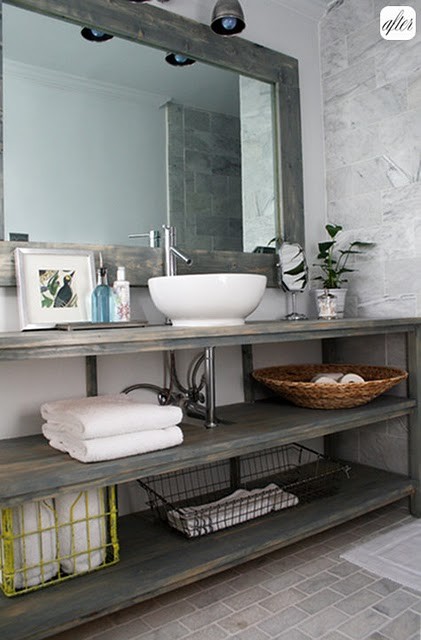
I really want an open concept bathroom vanity.  Maybe something with a barn wood or driftwood style base like this one above or below!  Barn Light Electric is a great site to find lighting like the one above!

 I love how this sink looks in this photo.  Sort of a farmhouse mixing bowl sink.  I am dying to put some wire baskets underneath and fill one with hand towels and the other with spare toilet paper.


 This bathroom is flawless!  Yes Please!


 This one is exactly what I am envisioning!  To fit it in my budget, I think I would have to build it myself, but if your pocketbook allows, you can purchase this one from Restoration Hardware.


Hopefully you are inspired by some of these beautiful bathrooms like I have been and if you happen to know any of these picture sources, please send me a message, so I can give them credit!