So I mentioned in a previous post that I wanted to do a doggy bed after seeing Lesa's dog bed for her adorable dog Daisy.
So this is what we created:
We decided to make Dozer a pallet bed this weekend. We had the pallets, we just needed to figure out how we were going to take them apart.
There is a couple of ways to take apart a pallet. I think the easiest way to do it is to cut straight down next to where the pallet board is attached to the sides. That way you are left with nice even pieces. The problem with that is when you want a longer board for a project you have to go to the second option, which is to use a sawzall and cut right through the nails. Since we needed the longer boards, we went with the second option.
So this meant a trip to Lowes to pick up a few things.
First, we stopped in and picked up some new blades for the sawzall.
Then we went searchin' for the casters. There were several to choose from, but I needed to make sure that the base of the caster would fit the frame of the bed . I also wanted to go with the shiny industrial feel to match some of the pieces in the room, so I thought that the "all silver" one would work great!
The kids love the new baskets, or should I say I love the new baskets because happy kids = happy shopping trip. At this point they were equalling out who had more in their basket. "Dad give me your sunglasses to put in my basket. Mom, what about your purse. I can carry it."
We went with 2 packs of the 10 x 1 screws. Make sure to check the size of the hole on the caster against the screw head size. That might be a silly thing to mention, but I have made that mistake before.
I think we got what we came for. Time to check out!
Starting the Project
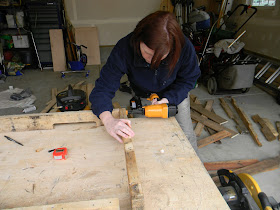
Using the sawzall, we cut the pallet boards off the base. What is up with my face? I meant business!
Once you have taken off the boards, make sure to hammer in any staples and take out any nails that are sticking through. If you don't, and you throw the board on the floor, this could happen...
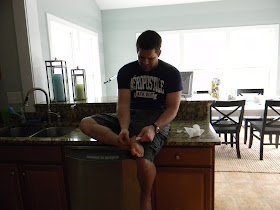
Now, I'm not gonna say who left the board on the floor with a nail stickin' up, but the culprit is sitting on a counter. That's all I'm gonna say :) Thank goodness it didn't go too deep and someone was up to date on his tetanus shot! Whew!
Hi ho, hi ho, back to work we go...
Some of the nails really took some work cutting through!
The next step is to ask your daughter if she will take a few pictures while your working, since for an 8 year old she is a pretty darn good photographer! Now if I had an extremely expensive camera, I would definitely skip this step ;)
I thought she was doing a nice job until I was pulling pics for the post and came across this...
Hilarious! She has some sort of infatuation with taking extreme close ups!
She cracks me up!
So since these 2 pics have nothing to do with a dog pallet bed, let's get back to work.
Our Cut List
You will need:
(2) 1 1/2 x 36 x 3 in. pieces for the base frame
(2) 1 1/2 x 25 x 3 in. pieces for the sides of the base
(1) 1 1/2 x 24 1/2 x 3 in. piece for the middle support on the base
(2) 1 x 36 x 3 in. pieces (for the back)
(1) 1 x 36 x 6 in. piece (for the front)
(4) 1 x 26 x 3 in. pieces (for the sides)
(1) long stake cut into (4) 5 in. pieces
(6) 1 x 35 x 3 1/2 in. boards that lay across the base frame
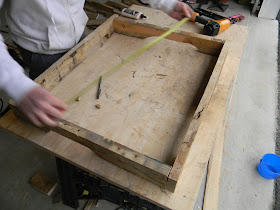
We used the dog cushion to measure our base. So we cut the base of the bed to 25 x 35.
Before we nailed the boards together, we put some wood glue at the joints.
In this shot, we put a support board in the center, glued and nailed it. The support board measured approx. 24 1/2 inches. Then we chose some really cool looking pallet pieces and laid them against the base.

We measured and cut the boards to fit.
 Then we nailed the pieces to the support frame.
Once the first layer was nailed, we took an old stake I had laying around and cut it into (4) 5 in. pieces. And attached each piece to the corners.
Next we just attached the top layer to the stakes.
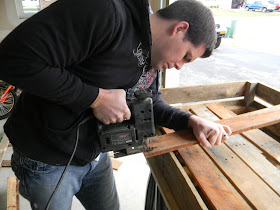
The hubs cut the planks to fit inside the frame. Don't forget to cut out a notch on all four corners to fit around the post (Stake).
Perfecto Mundo!
Now just nail the boards down to the frame. We just eyeballed the spacing between each board. It doesn't have to be perfect since the cushion is going on top. I won't tell if you won't ;)
Then came the final step of adding the casters.
We predrilled holes for the screws so the wood didn't split and then we attached the casters to the base.
Ahhh, happy puppy!
Now for the real test, What do you think Dozer?
Sniff, Sniff
I think I likey.
I give it ONE tongue wag!
Then I was curious to try the tea staining method. I followed the recipe from Frugal Farm House Design. Click here to check out her wonderful tutorial.
I put the steel wool in a jar, covered it in white vinegar and let it dissolve for almost two days.
When I was ready, I boiled two cups of water and put two Earl Gray tea bags in the water to steep.
I brushed the dog bed with the tea and let it dry completely.
Once it was dry, I brushed the vinegar mix on the bed frame.
This picture was nice, but it dried much darker, so I dry brushed some white paint (mixed with a little water) on the wood to lighten it up a bit.
I am really HAPPY with how it turned out!
And I think Dozer is happy with his birthday present!
*Ok, I did put his name on the front, but it didn't turn out well, so I sanded it off. I will try and do it a different way and see if I can get it to come out right.
And that's how we built our puppy bed!


Cute bed and adorable dog!
ReplyDeleteBrit - it's awesome! You're rocking DIY lately! ;)
ReplyDeleteYour daughter is super cute and a great photographer!
Thanks so much! she is a mess and keeps us laughing on a daily basis :)
Deleteps. Brit - I'm going to include a link back in this week's highlights. :)
ReplyDeleteFound you through the "DIY Show off", I love this idea. It's adorable and I think I'll bookmark it for one day when we get a dog. Thanks for documenting so much!
ReplyDeletegrantandbritt.blogspot.com
Love it. You guys did a great job! Lesa
ReplyDeleteI appreciate it so much, I was hoping that people would enjoy the doggy bed tutorial!! Thanks again :)
ReplyDeleteFound you at the DIY showoff! That dozer is one lucky dog. I was so happy to see this project. My bandit needs a new bed!
ReplyDeleteHi Maryann, thanks for stopping in! Dozer is sleeping in his bed now, so it is still getting used pretty regularly!! I bet Bandit would love one too :)
ReplyDeleteI found you on Deaf Dogs Rock. Thanks for sharing the idea - it looks like a very functional and sturdy bed! I'd like to share this idea on my blog at www.RadcliffDeafDog.com.
ReplyDeleteThat would be awesome! Thanks for everything you are doing for deaf dogs :) Your site is great!
DeleteThat is just too darn cute! I have a little guy who needs a bed. I might have to try something like this! Thanks for linking up last week at Whimsy Wednesday!
ReplyDeleteAmy@homehappyhome