Pages

June 25, 2012

It's A Gray Day!

Good Evening' 

 I wanted to share with you guys some of the paint choices I am debating on for the Master Bedroom I will be putting together in just about 2 weeks.  I have nearly purchased all of my goodies for the room, but I am still in search of an antique dresser, a really cute office chair, some lamp shades, 2 large Euro Shams for the bed, and several other little things.  These next two weeks will most likely fly by since I have a list of AWESOME diy projects to tackle for this room!!!

Lets have a look at the Menu, shall we :)

1.   A DIY headboard (Can't wait to build this guy)

2.   A piece of abstract art
 (Hopefully I will cross this off my list tonight after we hit the beach) 

What, don't you take breaks before the project starts, lol? 

3.  Painting the desk white

4. Painting the tall dresser black and adding new hardware

5. Painting the long dresser (Yep, the one I haven't found yet) and adding new hardware

6.  Spray paint a few accessories for the room. 

So, now that I've looked at my 6 Course Meal, ha ha get it 6 items on the list, so it's a 6 course meal!  I know, Genius, LOL!

Here are some of the color choices that I think would look great for the walls.

First up we have...

Gray Screen by Sherwin Williams


This is what I know about Gray Screen, it is a gorgeous bluey gray!  My friends painted their downstairs with it and Ahhh, I am in love!!


Next Up...

Mindful Gray by Sherwin Williams


SW6246 North Star
I know, I know, say no more, not to mention that the color combo in here is perfect!!!


And Finally we have...

Nimbus Cloud by Martha Stewart


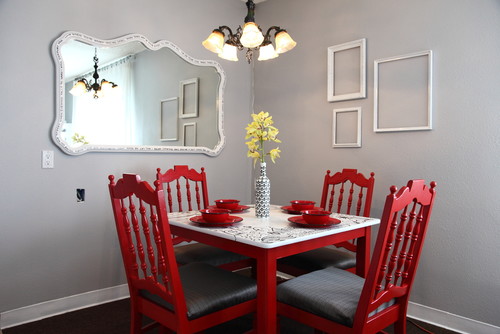
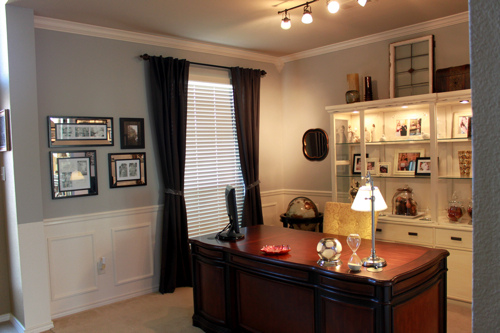
Is it just me or do all of the color chips look the same?  Well nevermind, atleast you can see how the colors are in the room examples. 

I think Gray Screen has a nice blue to it, Mindful Gray is lighter than Gray Screen and has more of a warm gray undertone, and Nimbus Cloud, well, that should be chosen simply because the name reminds me of Harry Potter and it is a lovely soft warm gray! 

 So them there are my lovely choices. Which one do you like?

June 24, 2012

I've Been Shopping...

Did you guys have a nice weekend?  Ours was GREAT!  

 Friday, I had some down time relaxing with the kids and I met with my client, did the measuring, and went over the plans for her Master Bedroom.  Saturday,  consisted of a really fun trip to HomeGoods!  I know, I know, I always go to HomeGoods, but, it's AWESOME!!! :)  
I stole my mum for the day!  We got LOST, we had a rock CRACK the window of her truck, but have no fear, we stayed strong and kept our eyes on the decor ;-)

At HomeGoods, I found the curtains I wanted.   I needed 8 panels so we tossed these bad boys in the cart...

 
I would have liked them to have a silver grommet, but beggars can't be choosers.  In all the stores we went to, these where the only purple curtains I found and this deal was to good to pass up.  I may paint them with a little matte silver.  Decisions... Decisions...


Hello Beautiful!  What can I say about these pillows, well, I think they make the room!!  You know what I'm sayin' right?

We also found this hour glass for her desk area...


And this Corbel...

A little white spray paint and this guy will be good as new!


Here is the Design Board...


The mirror is to the left and the ceramic dish and vase, although small in this picture, are to the right on the dresser. 
 
Here is the ceramic dish I found...


And the lovely mirror...


And the purple and white swirled vases...


I was thrilled!!!  I use that word a lot, but I really was :)

After I dropped off my mum, I headed home with my goodies in tow, but my day did not end there. 

Wait, where are my kids you ask?  Well...

Since it is now summer time, we get to spend more time with the grandparents than when the kids are in school and always on the go.  Sooooo, since my mother in law took my kiddos for the night, I went all WILD and CRAZY and hit up our local TJMaxx with my friend! I came across this cute little pencil or pen holder for my client's desk. Why I get so excited when things spin, I will never know, but YAY, it spins!!!


And then I found a great comforter set...


 So, this morning before I picked up the kiddos, I headed to the TJMaxx by my mother in law's house and I found some night stands that I thought would go great in the room!

Has this ever happened to you, You are in a store and you eye something, let's just say a night stand for example.  Then you say to your husband, these would work great in the room if I could just find another one.  As you spot the matching table, you see a woman is eyeing the other table, but she has not claimed it yet, so you swoop in and grab it and say proudly to your husband, "Oh hear is the other one that matches it."  Like these tables where twins and you can't get one without the other.  NO, THIS HAS NEVER HAPPENED TO YOU?  Me either ;-) 

Then I just made him pretty much guard them, you know, like a "TJMaxx bouncer" while I went browsing for anything else and as I came to the end of every isle, I would look over at him, make sure the tables where there, and nod and he would nod back.  Why talk, when a nod says it all? 

Here are the night stands ...


Although they are a different shape than the ones in the design board, they will do the trick!

In my post tomorrow, I will be sharing the grays that I am debating on for the wall color in their Master Bedroom.  Do you have a go to gray that you love? 

Oh, and a bit of really GREAT news, today I took on another client who would like three rooms done in her house!  Sooo excited! 

June 21, 2012

Go For Launch!!!

Good morning or maybe good early afternoon!   I couldn't contain my excitement any longer so I decided to jump on the blog and share a bit of news with you.  This morning I got an email back from the client that I did this mood board for...


And she has given me the go ahead to recreate this room for her!  Ahhh!  I am thrilled :)   The other exciting part is that I will be recreating this room on a low budget, so that means some DIY projects.  Which if you know me, you know that this type of thing is right up my ALLEY!  I will be doing DIY artwork, a DIY headboard, and purchasing some thrift items such as the dresser and possibly the benches and giving them a makeover.  The cool part is that I will have lots of new things to blog about with you guys as I transform this Master Bedroom.   It should be a lot of fun!!!

June 19, 2012

Traditional Contemporay Master Bedroom

I hope you guys had a great Tuesday!  I had an awesome day, lots of fun at our local theme park with the kiddos and one of my great friend!  We only got through three rides before we were wiped out.  Apparently, we are not ready for the summer heat ;) 

I also had the opportunity to send my first OFFICIAL mood board to my Very First Client!  Ahhh!!!
I was excited and nervous all in the same.  I just hoped the client liked it as much as I did.  I only had to wait a few hours for her email to find out that she loved it.  Yay!!!  She really liked the color combo I had created and the blend of traditional and contemporary furniture pieces that I put into the design.   It looks like she might want me to decorate the room too, fingers crossed!

The client didn't mind me sharing the board with you, so here is my idea of a traditional contemporary Master Bedroom...


Hope you guys like it :) 

June 15, 2012

Under Construction

The blog is under a bit of construction due to the switch over of my interior decorating business.  I wanted to keep everything simple and easy, so I thought switching the name of the blog over from A Brit of Happiness to Seaside Interiors would feel more uniformed to me :)

So, Please bare with me through this process.  I still have some other smaller blog changes, but nothing too crazy!!!

Nearing the End of Our Outdoor Projects

Do you ever work on a project and think it's gonna take a while and and you finish it in record time, NO,  me either ;-)

We have been working on our fence and shed now since what FEELS like forever, but has actually been since April.  Since my husband and I have been trying to complete outside projects after work and between family activities, it has taken a bit longer than we thought.  That seems the way for most larger projects, Right?  Some hiccups or bumps in the road are to be expected!

We painted the shed last week and the color was supposed to be the same as the house color, a light beige color, but turned out more like a creamy white.  So, yesterday was round two, and it turned out a lot nicer. 

So as of today, I can SEE the end in site for these two projects.

Here is the hubs working hard, putting the first coat of primer on the shed.  He has been working so hard at his other two jobs that he is probably asleep behind those glasses!  Ya think?  I don't know how he accomplishes all the things he does, but he is amazing and we adore him!  Happy early Father's Day, Dusty!!!


And whilst Dusty was workin' hard, so was Dozer...


Trying to catch flying insects and finding the right spot to nap, just wears him out! 


So with one coat of primer, the shed was on its way.

And the fence is not far behind.  We completed most of it, except for the part that attaches to the shed.


We have to finish the shed trim work before we can add the last post on either side of the shed and the gate on this side.   So, NO WORRIES, this is not our version of COMPLETING the fence, even if we are OVER this project ;)


Yesterday, we took a trip to Lowes to see if they could fix the mistake of how light the shed paint was (sorry I didn't get a picture of it, but if you take the primer a couple shades darker that is what it looked like).  The men at Lowes worked to correct the color, but in the end, we left with a new bucket since the previous one was TOO STUBBORN TO DARKEN UP!
Here is the pictures I took this morning of the new color...


It looks a little lighter in the photo, but it almost matches the house, so I am good with that!

The shed is in need of a few finishing touches:

1. All white trim around the bottom, door frame, and side frame.

And then the rest are DIY projects.

2. New black shutters
3. A ramp to push the lawn mower in and out of the shed
  4. A nice flower planter under the window


I thought I would leave you with a picture of the almost completed fence.  As soon as we can sink the last two posts and attach it to the shed, we will spray that sucker white and call it a day, or a month, or 3! 


This week has been a bit KRAZY for us, as I'm sure it has with those of you whose kids are finishing up school.  We had a week of Dress in the dark day, wacky hair day, twin day, hat day, and wear a jersey to school day.  I used to love doing those things in school. 

Then, my daughter had her Luau Day in second grade that I worked the limbo station for and this morning my son had his Wacky Olympics and I was able to run the sponge relay for that and their outside breakfast for the 4th grade class.  It really has felt like a race to the finish this week, but today was their official last day of school, so they are THRILLED and me, well, I am Thrilled and Drained !!! 

Tomorrow,  Dustin has plans to work on the shed, while I head out with the kids to a local farmers market to pick up some things for the Sunday breakfast at our house for Father's Day and later a Father's Day BBQ at my mother in laws house.  Should be a great weekend!!!

So, I am a bit behind the ball on getting Father's Day gifts.  Any ideas?  What did you get the men in your life for Father's Day?   I would love to hear what you came up with! 


June 04, 2012

Progress on Seaside Interiors

Good evening everyone!  I hope you had a great weekend!  I don't know about everyone else, but I am READY for summer!  This morning I felt like a teenager when my husband woke me up before he left for work and I fell back asleep and he came back in the room and said "Seriously, get up it's not summer yet."  Come on, 5 more minutes!!!  

I am that person that tells my kids, "ONLY 3 MORE days of school, ONLY 2 MORE days of school."  I am also that person at the end of summer break that tells my kids, "ONLY 3 MORE days till school BEGINS, ONLY 2 MORE days till school BEGINS."  I can't wait for summer break to begin and I equally can't wait to get them in school at the end of summer.  ;-)  Whose with me?

For me, summer break means relaxing by the pool.  The only pool we are gonna have is a plastic Walmart one for the doggy and I can't picture me laying in 4 inches of water to cool off :)   So I will be hauling the kids to Nana's and Grandma's house to enjoy their pools.  The type that you can actually jump in without breaking the plastic. 

Summer for me also means the start up of my new interior decorating business and the completion of some much needed projects around our house!

As far as the smaller projects of completion for the business, I have checked a few off my list.


List of To Do's For Seaside Interiors:

Building a Website
Setting up my Office
Make my Brochures
Begin Marketing my Business
Adding an E-Design Option to my blog and/or website
Have a logo made

 I mentioned a couple weeks ago about working with Molly from Mixed Molly Designs to complete my logo and business cards and as of today, they have been completed!  I had so much fun during this process!  I can't say enough about working with Molly, she was so very patient with the entire process and worked back and forth until I was completely satisfied with everything!

So, here is my logo:

I am soo thrilled with how the logo turned out!  To me it says relaxing and laid back, yet professional

 
And here is the front and back of my business card:
I also set up my website, which you can see here.  I went through a site called www.wix.com.  Since it seemed easy to utilize their templates and make it my own.  I have a lot of work to do on it, but I was just glad to get it up and running!

The third thing that I was able to check off on my list was the brochures.  I tried to make my own on word, NOT SO MUCH ;-)  So, I went searching online and found www.uprinting.com.  It took me a long time to create it because I am definitely not computer savvy!  I think in the end it turned out pretty nice.  I had to use my camera to take a pic of the computer screen since I couldn't save the picture of it.  It is a very poor picture, but none the less, here is the inside and outside of the brochure:

Outside of brochure before it is folded!


Inside of brochure before it is folded!

The first picture is closer to the actual colors, the second picture above is way off!  The color on their site is much better, I promise ;)

So, I feel like have gotten quite a few things completed, YAY!

Oh, and I promise we are nearing the end of our outside projects on the shed and fence.  I will post some pictures soon!