Pages

April 30, 2012

Stylish Gardening

 I love being outside in our yard!  To me it is very peaceful.  Just picking weeds, dead heading my hanging plants, and fertilizing my gardens are something I find that completely relaxes me.  I know, call me crazy ;)  I figured since we are spending a lot of time in our yard finishing up our fence (which should be completed and possibly sprayed white by this weekend), I should start thinking about how I want to build my garden beds.
Since I am dreamland planning my veggie gardens, I thought it would be fun to find some inspirational things I would love to have while working outside.  So let's see what I found...
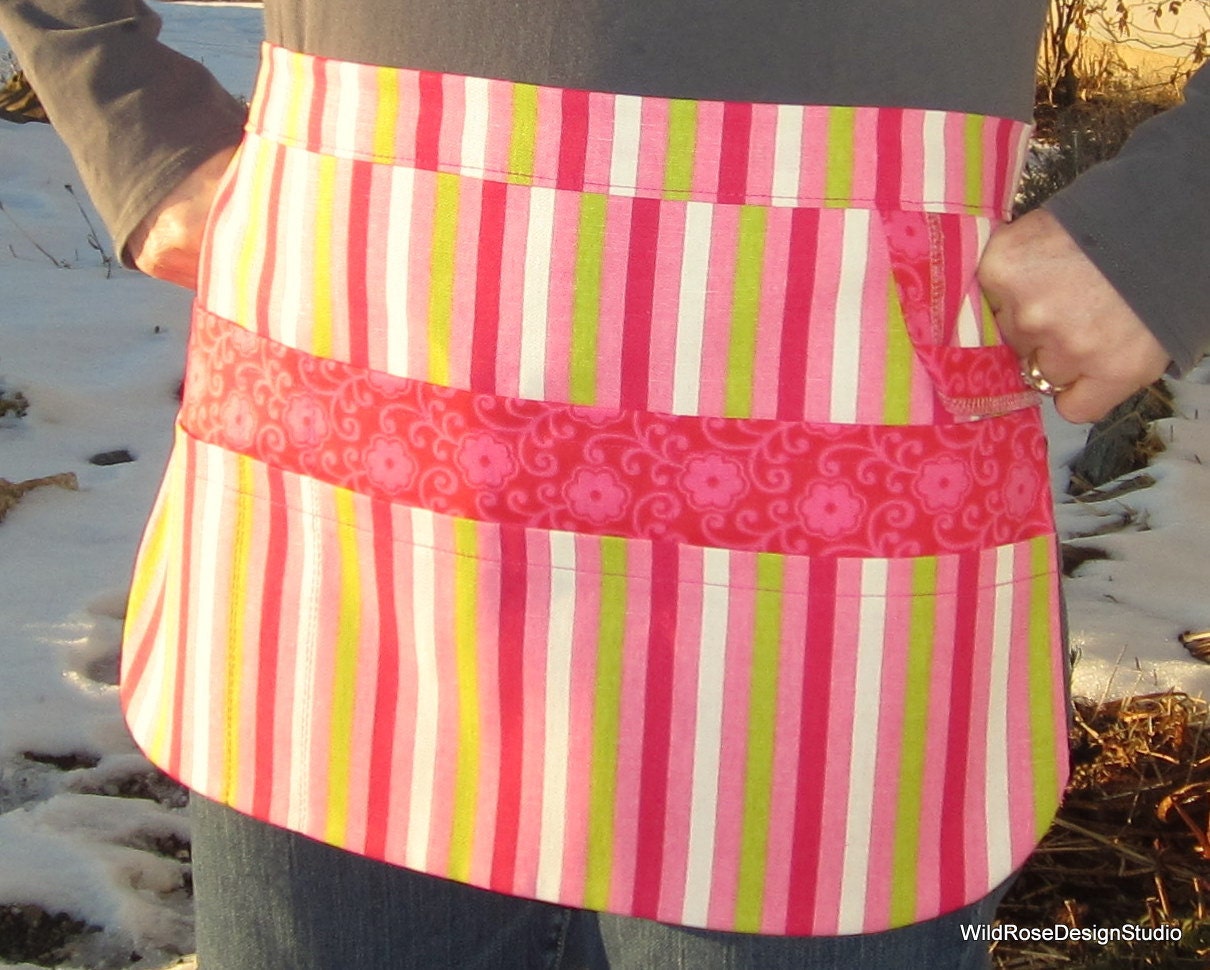
8-Pocket Utility Tool Gardening Apron in Pink Green White Candy Stripe & Pink Floral - size S/M
 This is an adorable gardening apron.  You can find so many different ones on Etsy that might suit your needs and if you are a savvy sewer, you can whip up a quick one on your own.  See here and here for two wonderful tutorials on making one of your own.   Fill this with all of your gardening bits and you are on your way!


Instead of just wrapping it around your waist, Jen at I Heart Organizing wrapped hers around a 5 gallon bucket and filled the bucket with potting soil. Check out the rest of her post here. Everything you need in arms reach and a great way to keep it all organized!
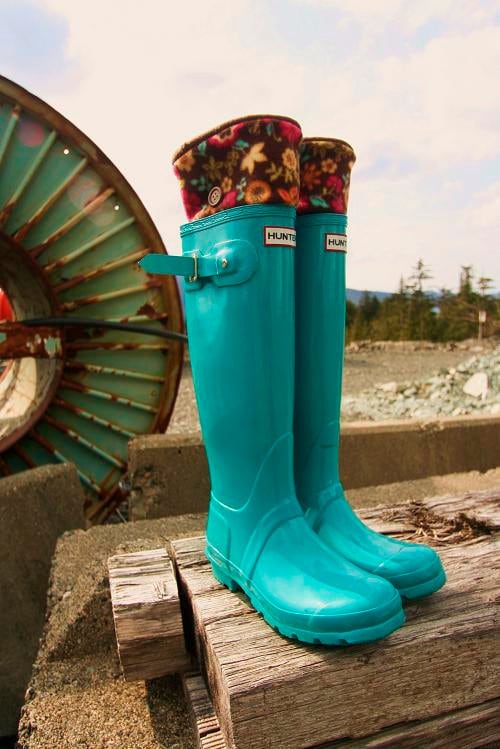


SLUGS Fleece Rain Boot Liners in Brown with a Bright Floral Patten Cuff, Fleece Socks, Spring Fashion, April Showers ((Sm/Med 6-8 Boot)
Yes Please!  I can't begin to say how much I love these rain boot inserts called Slugs created by Rayana from With The Rain Comes Slugs.  You can check out her site here , not only functional, but very fashionable!!!  They would be perfect for a fall or winter style.
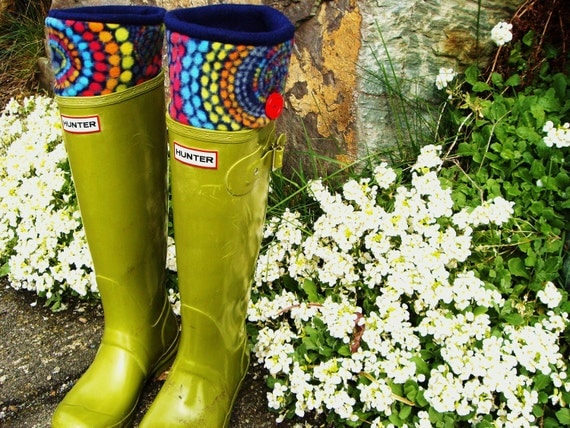

 
SLUGS Fleece Rain Boot Liners Navy In Rainbow Geometric Circle Pattern Cuff, Spring Fashion, Gardening Style, Outdoors (Sm/Med 6-8 Boot)
 I would also love my own pair of rain/garden boots so that I can slosh around the yard or take the dog out to do his business on rainy days. 

Right now, my husband and I share his grandpa's hand me down rain boots.  Maybe, (hint hint) some lovely husband of mine is wondering what to possibly get me for Mother's Day.  Well, look no further ;) 

And speaking of Mother's Day...

sunflowers
Source
Why not add some awesome sunflowers or other floral arrangement to a cute pair of garden boots and make mom happy.
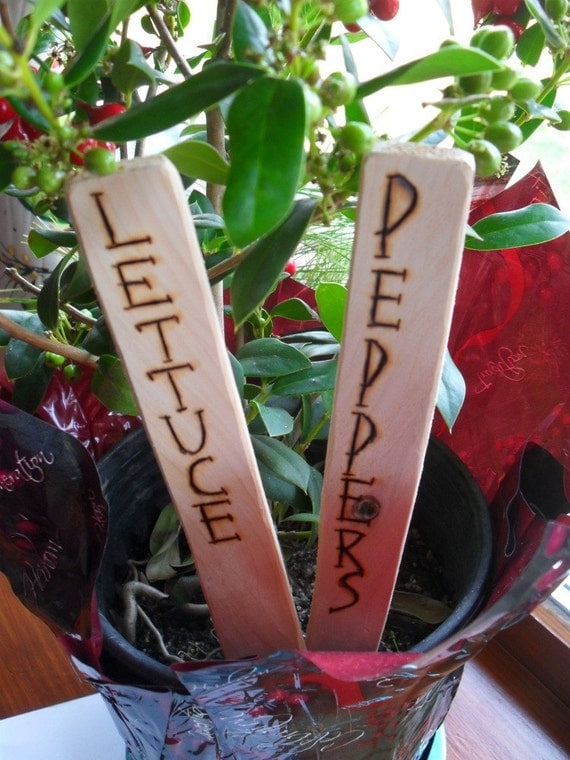

 Garden Plant Markers 2 Each Wood Burned Letters
These would be great to stake in front of each veggie section.  These ones are sold on Etsy for $5 for 2.  These would be wonderful, but since I would like a garden with various vegetables, this would add up a little too quickly in price for me.  I think I will just purchase a pack of cheap stakes from Lowes and paint the names of my veggies on them.  Should be  a quick and fun DIY project. 


 Garden for the Cause Gardening Tools, Bag and Kneeling Pad

 I think having a sort of carry bag to take with you around they yard is nice.  This would be another option to keep all of your tools organized and accessible.
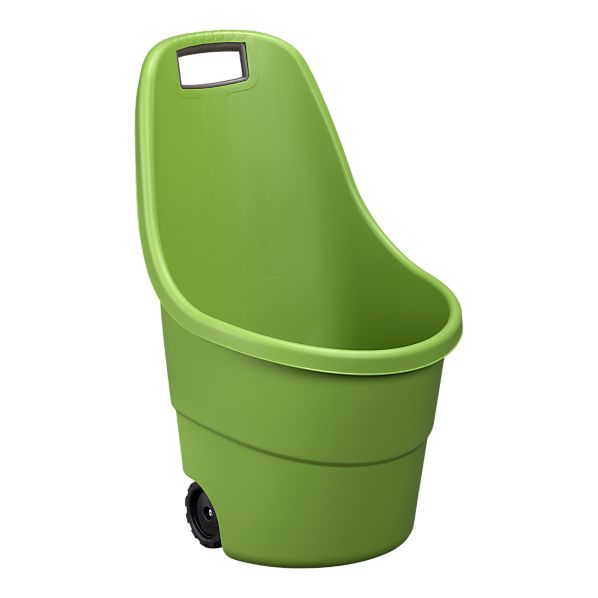
AllInOneBucketGreenOT12
Wagons are fine to carry all of your things around the yard, but when I saw this on Crate and Barrel,  (Oooh, Ahhh)  I just had to include it. :)  The shape alone looks like it would be very easy to handle and pull around the yard.
Pinned Image
Who doesn't need a really cute set of garden tools?  These ones from Target are great.  They have a really nice curved handle to give you a better hold. The really cool thing is that I spotted some almost identical to these at none other than, TJMaxx.  I think I may pick a few of them up. 
First, the price was very reasonable, I think around $4 or $5 each.  Second, for those of you who are not familiar with garden tools like myself, the third tool over in the picture is a weed tool.  It digs into the ground and gets to the bottom of the root, so that the weed will not come back.  I think that tool alone could be my new best friend in the garden.
Hope you enjoyed these fun finds for gardening :) 

April 26, 2012

Sweet Shop Birthday Party

Happy Thursday Everyone! Yesterday I shared my son's Camp out Birthday Party from his party last year and so today I thought I'd keep the party rolling and share my daughter's Sweet Treats Birthday Party. 

She is my kind of girl!  Let's plan an entire party around CANDY!!!

Lacey's Sweet Shop
  I bought the pink scalloped cardboard containers from Walmart for about $2 for eight. Then I made up some Sweet Treats Labels and printed them on sticky backed paper and attached them to the containers. I try to buy my candy for events online at places like Amazon and Candy Warehouse. Amazon sells most of their candy in 5 Ib. bulk bags for very cheap. I got the lollipops from Walmart for 50 cents ea. on clearance.


 For the dessert table, we did pink sprinkled cupcakes, cotton candy cones, and Oreo truffle pops.  To make the cones, I wrapped white card stock in the cone shape and taped them.  Then I used my circle punch  and cut out green circles of card stock, drew a black cursive L for Lacey on them and attached them to the cone.  I always use Styrofoam blocks to add height to a table.  Sometimes I just put them under the cloth to lift up trays and other times, I will cover them in wrapping paper and use them for various desserts.  To hold the cones up, I stuck lollipop sticks into the Styrofoam and just slid the cones onto the lollipop stick.


I was able to find a lot of sweet bags for presents at the dollar store.  We threw some wrapped candies on top of the built ins for good measure.


These were another take home treat, but these included non edible treats, like Ice Cream cone lip gloss and nail polish and other bath goodies.  We also did some very simple cupcakes since we had a dessert table that the girls could pick and choose from.


My most favorite thing was the wrapped pieces of candy hanging over the table!  I covered some paper lanterns that I already had with clear cellophane (The kind that you would wrap gift baskets in).  Then I took ribbon and tied of each end and hung them from the lights.  Or they could be little girls with pigtails. 


I think this picture says it all! 

The birthday girl in her element!  Ahh, what I wouldn't do to be a kid again :)


April 24, 2012

Campout Birthday

This week, I thought I would share a little more about how I found my way into decorating!  Since I can remember, I have always had an interest in crafts and creating.  For me that interest really took shape after I got married.  Specifically, when both of my babies began celebrating their birthdays. 

 Each year, I found myself preparing their parties months in advance, since that was the best way to get things on sale!!  The kids have had some wild and crazy parties, so I hope to share a few of them with you here and there :)

Today I want to share with you the birthday party that we had for our son's 9th birthday.  This was his birthday last year.  He wanted  a Camp Out themed party.  So we put our minds together and came up with some fun things!  He wanted a sleep over and since it was mid January, I didn't want any of the boys outside in summer tents in freezing cold weather. 

Hypothermia, frostbite?
 Not the kind of take home treats I was planning on giving out at this party ;) 


Ethan's favorite dessert is cheesecake, so I made a bunch of mini cheesecakes instead of cupcakes as his cake.  Apparently since I was a cake designer for 5 years, he is a bit caked out ;-)  I also made Chocolate Owl Pops and Chocolate covered Truffle Frogs!


A close up of the mini cheesecakes.  I just did the box mix of cheesecake and let them set in muffin pans.  Easy Peasy!


The owls where just Hershey's chocolate melted and molded into owl molds with lollipop sticks.  I added some raffia to the top of the lollipop sticks, wrapped a square cube of Styrofoam in wrapping paper and just popped the owls in.


I usually try to make Oreo truffles for each child's birthday.  I was lucky enough to find some frog molds.  I made my regular Oreo truffles filling.  Then I just used green chocolate discs that you can purchase at Michaels and I filled the molds with the green chocolate and flipped them over to leave just enough of a chocolate shell. In the freezer for a few minutes, then fill with Oreo truffle filling, one last coat of chocolate across the bottom and back in the freezer for a few minutes.  Viola, Oreo truffle froggies!


Who's Up For S'more? 


Here is the Smores Bar for Ethan and all his buds.  I already had the two little fondue/marshmallow roaster thingies.  I got technical right there ;-)  I picked them up at the thrift store for $6.95 ea. so they came in handy!


Different flavors of Graham Crackers.


To your left, on the chocolate tray is Oreo chocolate bars, milk chocolate bars, and peanut butter cups.  In the back, I put a few different flavors of marshmallows including chocolate swirl, regular, coconut, and strawberry. 


I wanted to give the kids a lot of options, so I came up with a Smore's Menu.   We had so much fun watching the kids try all of the different concoctions!

 
We also gave each of the boys a take home Smore's kit that I put together with two marshmallows on wooden skewers, some pieces of Hershey's chocolate, and 4 graham crackers (enough to make two Smores.


We set up their eating area in the morning room.  I threw some pine cones and acorns on top of some natural moss.   The corners of the napkins were folded on the edges so I could stand them up!  I was hoping they looked like tents in the end :)


In the morning, before all the boys left, we let each child put together their own treat bag for the road at the Candy Bar.  We had all sorts of goodies to pick from!


Sorry for the blurriness of the shot, but I couldn't leave out a little shot of the birthday boy blowing out his candles!


April 23, 2012

The Process of Painting

Okeydoke, before we get started, I just wanted to let you know that I am an amateur painter.  I have only done about 8-10 paintings before, so the hints and tips I would like to share with you are just my way of painting or setting up how to paint a picture.  Ok, now on to the fun part.

Here is the finished painting of Mr. Octopus.  So how did I get there?


MATERIALS FOR DRAWING
AND PAINTING

5 (10 1/4 x 35 1/4)  3/4 Plywood Boards
Pencil
Ruler/Yard stick
White paint (Your Choice to cover the entire piece)
Paint colors of your choice  (I used a bright Yellow and Folk Art's Bark Brown, Deep Ocean Blue, and Metallic Pearl White)
Measuring Tape
Paint brushes of various sizes
Paint dobbers in various sizes
Small paint roller

Start with your boards...


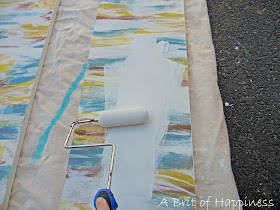
I had previously painted them with this pattern below, so I actually needed to repaint my boards.


I just threw three coats of white paint over it...


Once it was all painted white and dry, I began to draw the Octopus out on the boards.
Sometimes I just freehand my paintings, but since this picture had more detail, I wanted to make sure I had the dimensions correct.


Here is the picture I printed from online.  I took the paper and divided it as if it was the five boards.  I drew my first line across the center of the page and then I did the next 4 lines vertical to see where the parts of the Octopus would lay on the boards.


I pushed all of the boards together and found the center and drew the horizontal line across all 5 boards.  I didn't have to draw the vertical lines since the cuts of the boards are where the vertical lines are.


Following the template on the paper I knew what part of the Octopus was on each board.  I started on the MIDDLE board and drew it from there.  I then drew on the left two boards and then the right two boards. 


Notice all the smudge marks, yucky yuck.  There goes my fresh white paint job.  Nothing a little touch up won't fix.


A little color makes a huge difference!  To get the yellowish-green color, I mixed the yellow with some turquoise and a couple small blops of brown to deepen the color.  I always either add gray or brown to a color to tone things down.  To me, it always makes a more pleasant color.


More than halfway finished with the base color.

So now that all of the Chartreuse base coat is complete, I needed to add dimension.  In this picture, you can see how one dimensional it looks.  So instead of just going with white circles, I went with a metallic pearl color to give it some depth.


Paint dobbers are one of my favorite things to use when painting.  You can use them to make precise circles or even use it to push paint to the outside of the object. 

I was able to make the circles and then push down with more pressure to create a lip around the circle that gave the suckers some depth.


This is where you would first color in the circle and then again, just put down some pressure, make your circular motions and you will have a 3 dimensional circle :)


Here is a close up of what I mean with the dimension on the circles.  I finished by lightening up the chartreuse color with a little white paint  and then used this color to add the center dots in the middle of the circles.  I also painted a little eye for Mr. Octopus. 

Where you can see the darker green lines on the outside of the tentacle, I used the same method of adding a thick line of paint to give it dimension.  I did this by adding a lot of paint to the paint brush and putting pressure down as I went along the lines.  It seemed to section out the tentacles and allowed the head of the octopus to go into the background.


I used the paint roller with white paint and got as close to Mr. Octopus as I could without touching to clean up all the pencil smudges.  Then I used a small paint brush with white paint to clean up the edges of the octopus and I called it done!


So how did we get Mr. Octopus up on the wall?  Here is where my handy dandy husband helped :)


MATERIALS FOR HANGING THE PAINTING

Hammer
Level
Measuring Tape
Pencil
Drill
Drill Bits
Screws
Dry Wall Anchors
Square Measure


First measure the hole  1 in. from the top and 1 in. from the side.  Do this for the hole on the right too.  Use the square measure to draw your line across.


 Drill at the intersection of the 1 in. top and 1 in. across with a paddle bit (bit on the left) to start your hole.  Drill down to where the higher points on the paddle bit touches the wood (you will see a circle forming).  MAKE SURE NOT TO GO TO FAR or your point of your paddle bit will go through the front of the wood!  

Change to a drill bit of equal size to your paddle bit.   Use drill bit to drill out hole to desired depth.  There are other ways to do this, but Dustin said that for him, this was the most accurate way to have uniformed holes throughout the wood boards. 


We used 1 in. distance between each board.  Measuring the entire painting with the 1 in. distances added in we got a measurement of 55 1/2 inches.  Our measurements between the screws on each board is 8 1/2 inches.


One last shot of Mr. Octopus in the Family Room :)


Whew! All done!! 

Keep in mind there are other ways to hang the painting, such as picture hangers, but this is how Dustin did ours so I just wanted to share!!

Linking to:


                                                              Skip To My Lou

spread the joy


My Uncommon Slice of Suburbia
DIY Show Off